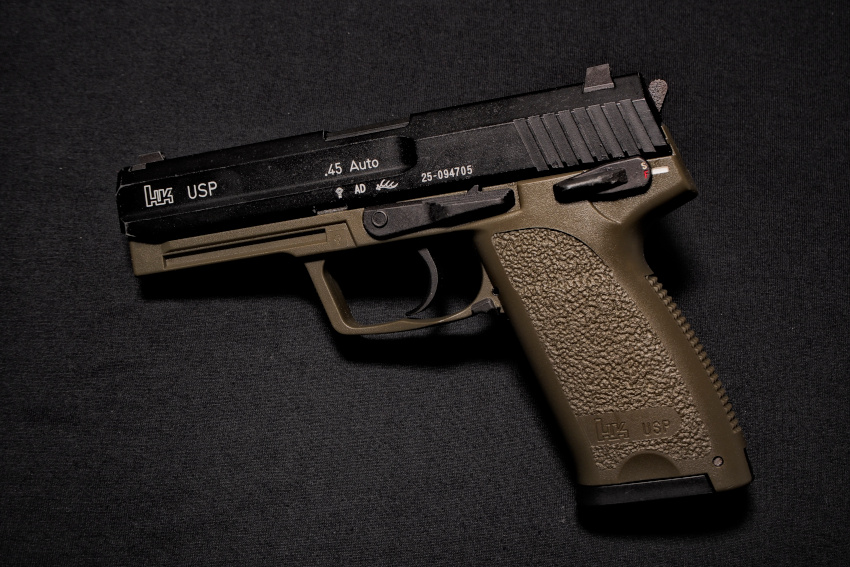
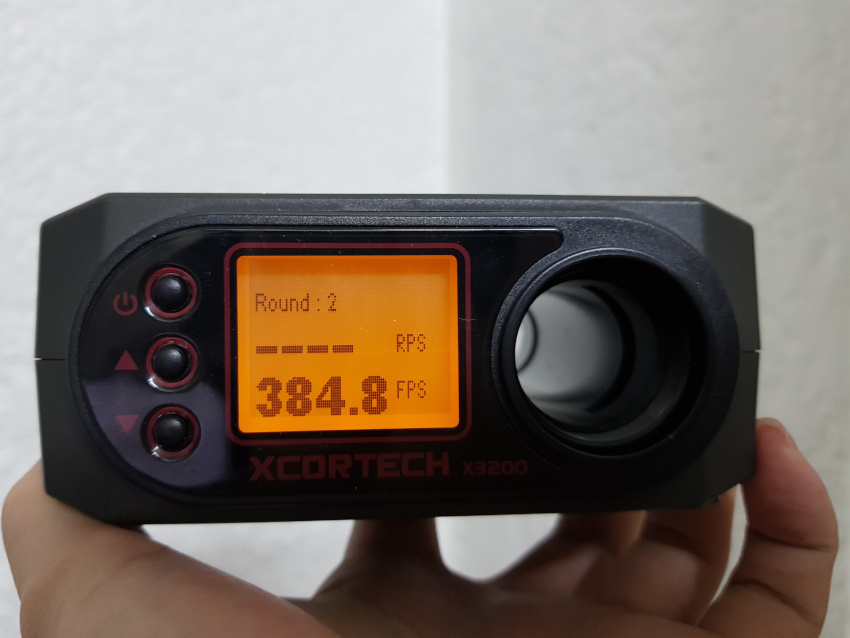
The KSC System 7 USP is an exceptionally performing gas blow back airsoft pistol. It kicks nicely and muzzle velocity readings are relatively high. However one has been sent in for repair of intermittent gas leaks and requires disassembly to fix.
Before continuing I thought it was best to give a little context to this repair. This isn’t the first time this GBB has been sent in for repairs. If I had to count, this would probably be the third. The first time it was sent over it had a shattered piston cup that ruined gas efficiency and made the muzzle velocity readings erratic. The second time it came in was due to a locked up action due to a bad fall.
I feel that the USP’s intermittent gas leaks are somehow related to the last repair done to the main dowel pin in the fire control group and is where I will focus my efforts. I’ve also prepared a video of the teardown below.
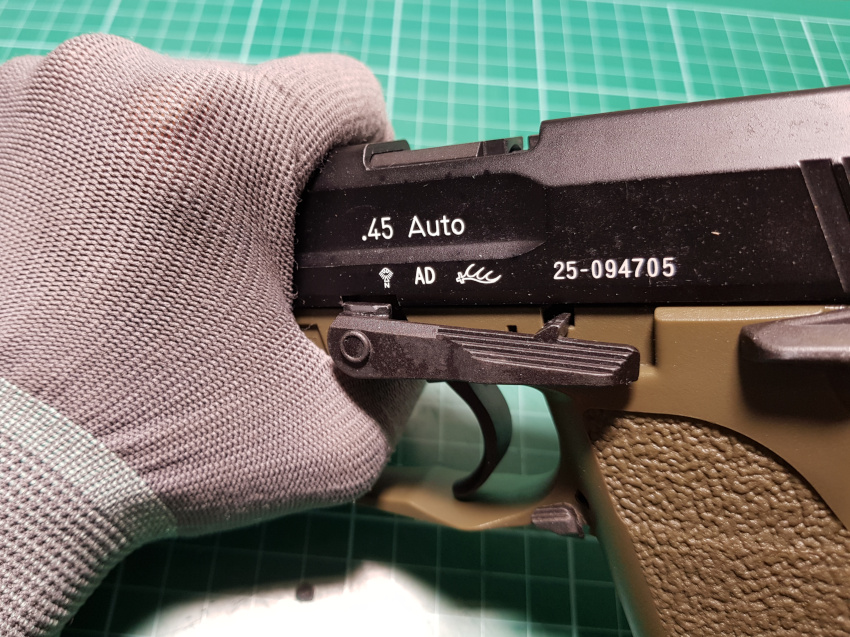
Remove Slide Stop
The first step of the inspection is to go through the field strip process by shifting the slide rearward and aligning the cut with the slide stop and removing it. Pulling the slide forward after should separate it from the lower frame revealing the fire control unit and trigger action.
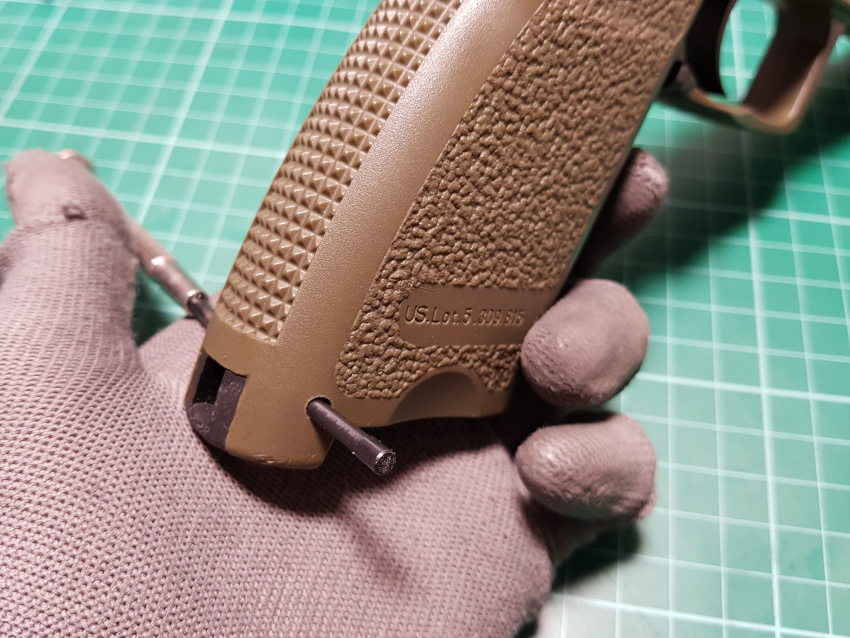
Remove Hammer Spring
With the slide off, remove the hammer spring to relieve tension from the action. To do this, lightly punch out the pin from the lower portion of the grip and remove the hammer spring stop which frees up the hammer spring.

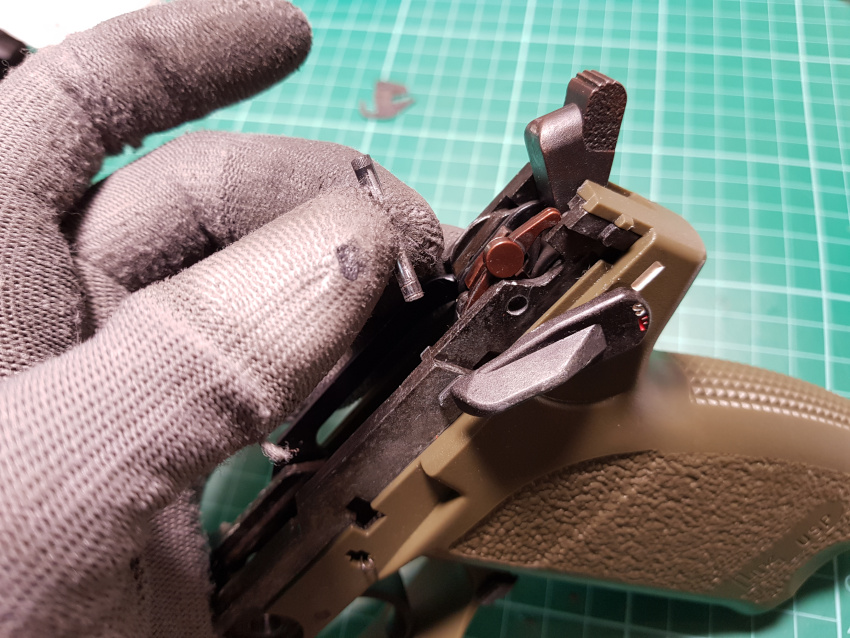
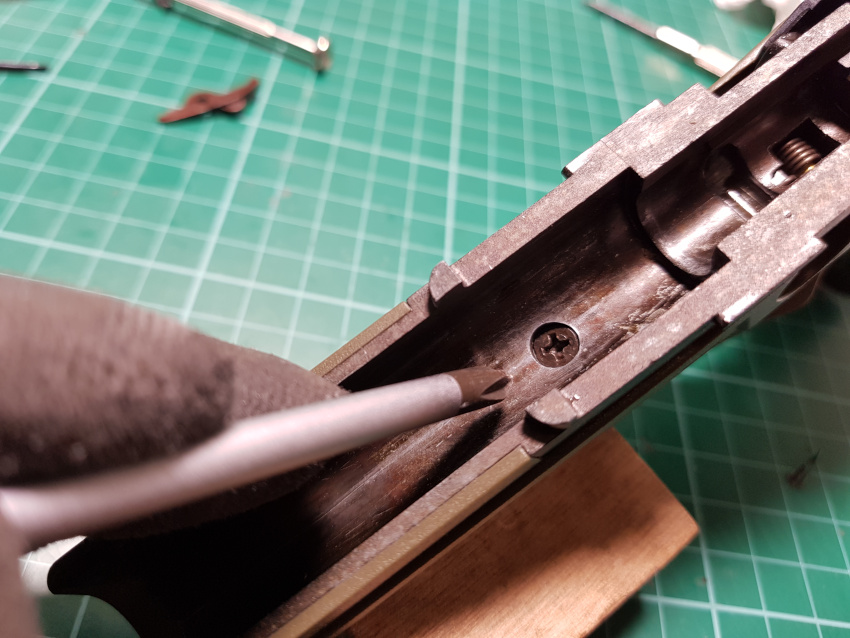
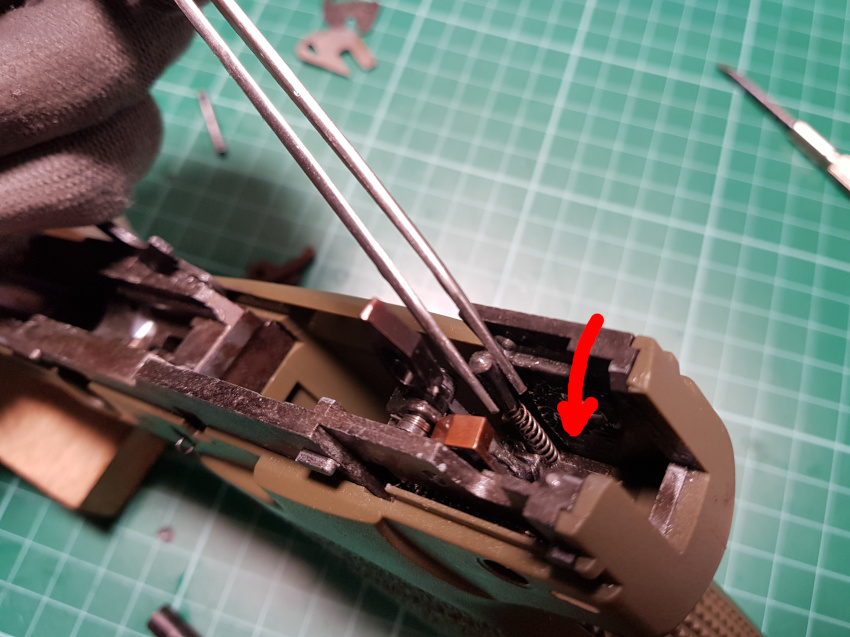
Repairing Main Pin
A closer look reveals a central dowel pin that runs through most of the action and keeps them in place. This dowel pin is part No. 61, which had previously bent due to fall damage. I have straightened it out already, but tapped at it again with a dead blow hammer for good measure. My theory is that it might still be ever so slightly bent. The markings created from initially using a vise grip to straighten the pin out probably contributed to the malfunction so I polished it off as well. Take care not to deform the knurled end of the dowel pin which enhances its grip on the frame and prevents it from going too far forward and damaging the slide. If you do manage to deform it, all is not lost. Carefully tap it from above to try and flare it.
After the pin was worked on the USP proceeded to operate flawlessly.
Further Disassembly
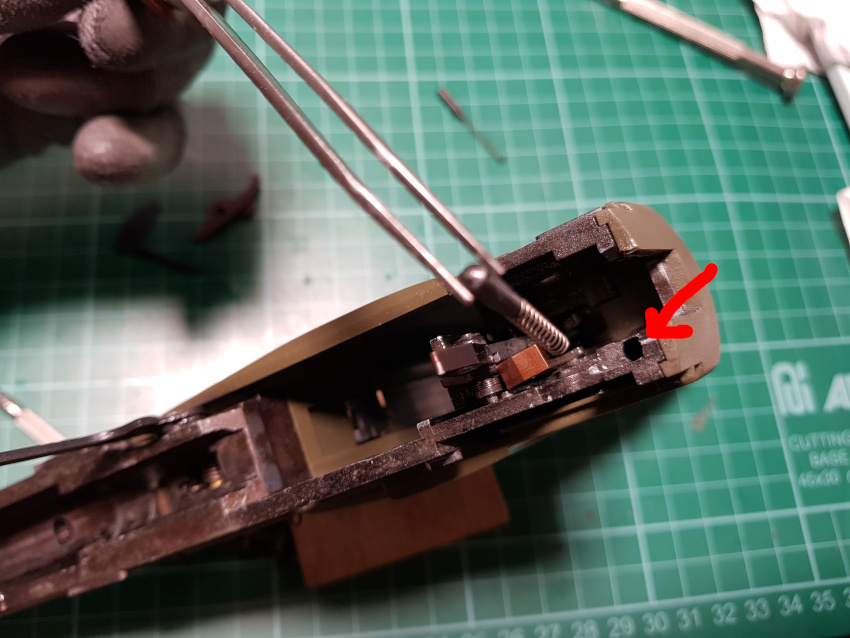
Removing USP Hammer Axle
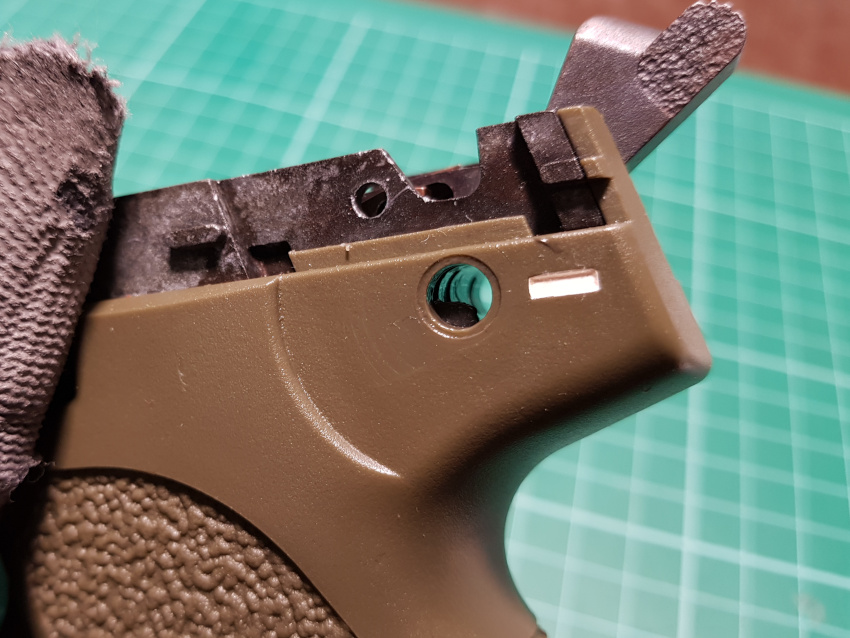
To free the fire control chassis and hammer from the lower frame the hammer axle needs to be removed. First remove the safety decocker lever. It is retained by a spring loaded indent plate that can be pushed down from the top of the lower frame pictured below. Stick in a tool and push it down which frees up the safety lever giving better access to the hammer axle. This indent plate also needs to be pushed down to release the hammer axle itself.
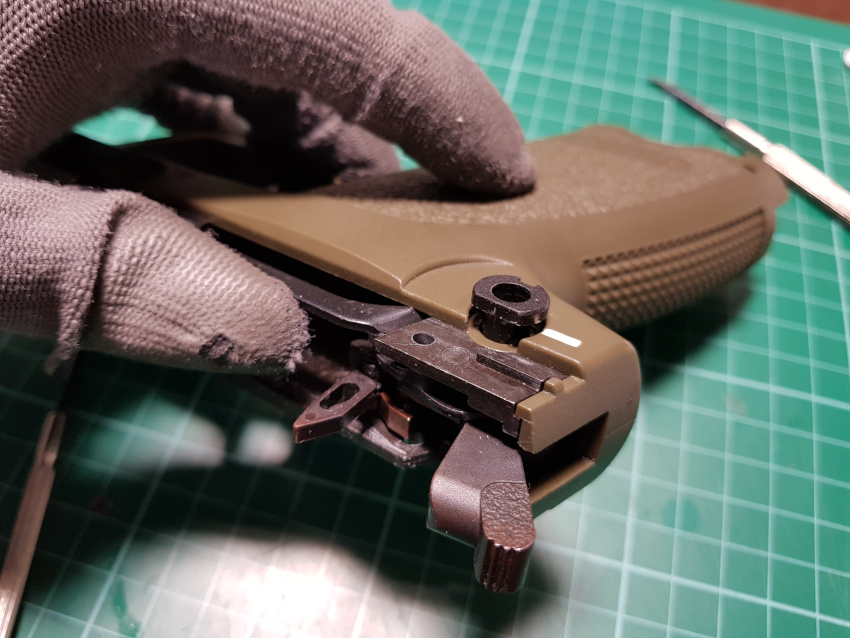
The hammer axle is retained by more parts of the action. In the diagram these will be No. 59, 60 and 71. These parts need to be pulled forward away from the axle before pulling it out. When the axle is removed the hammer can be removed as well.
Removing Slide Release Spring
Before the fire control chassis is removed the slide release spring needs to be removed or else it will snag and get damaged. The slide release spring is hook shaped and simply slots into the frame and fire control chassis. Thankfully there is a loop at the end to grab onto. With a small enough pick, hook onto the top of the spring inside the frame and press down which allows the spring to be yanked out.
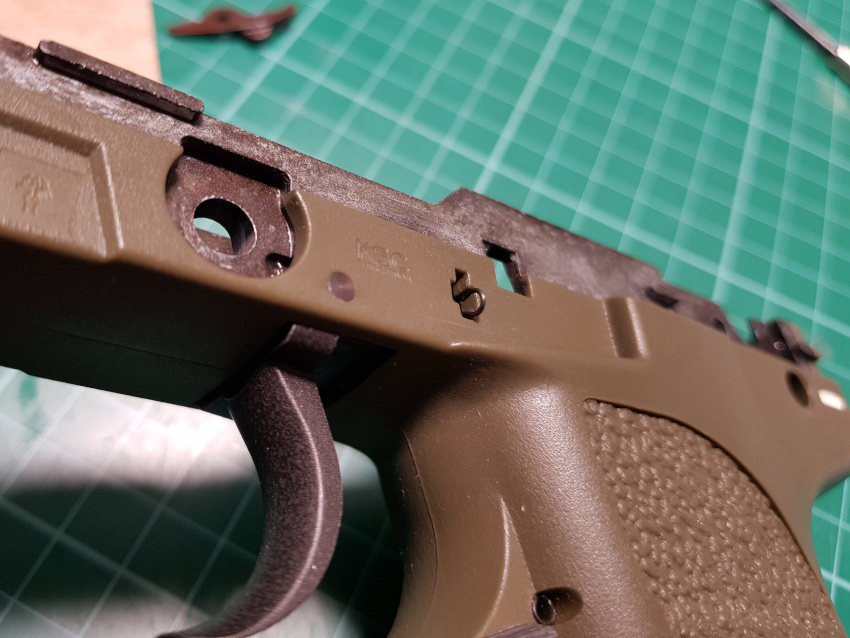

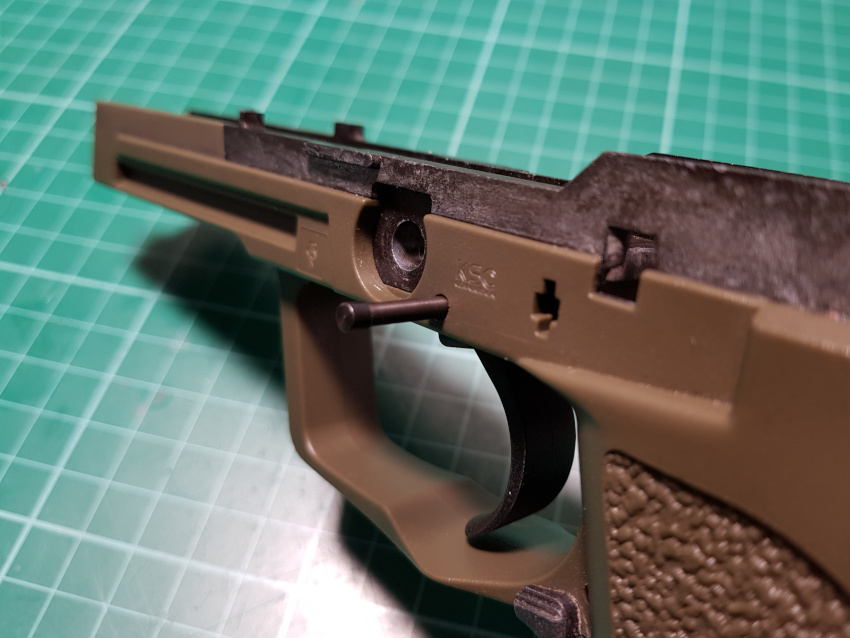
FCU Screw, Trigger and Chassis Pin
Finally, unscrew the screw that runs through the front of the chassis and lower frame. Then punch out the pin that goes through the trigger. After these two are removed simply pull and lift up the chassis from the lower frame to separate them.
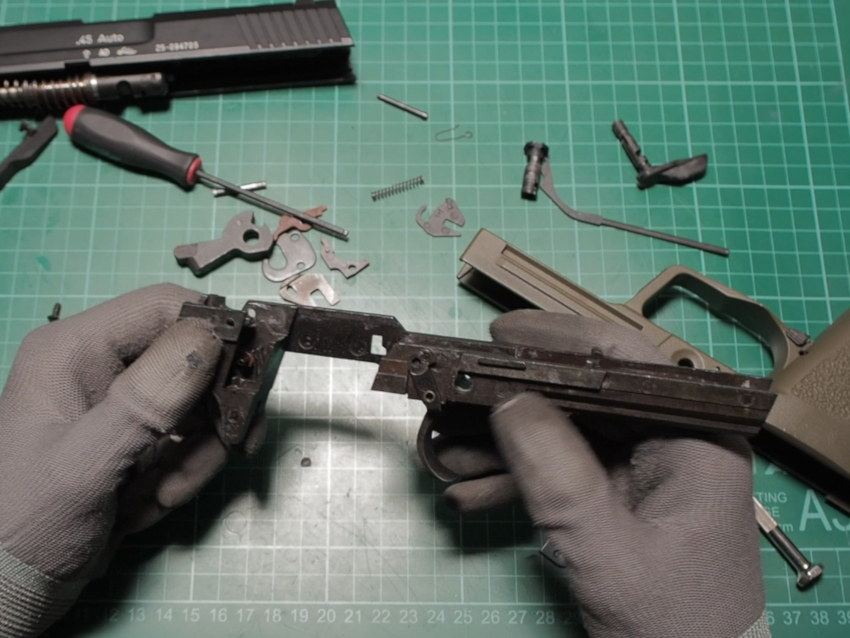
Further disassembly can be done but not necessary because most of the FCU can be reached with a brush for cleaning and lubing at this stage.
Keep Track of Springs
Apart from the main hammer spring there are three more springs that need to be accounted for. These springs provide a load on indents to keep the action under tension.
The first and easiest spring to get to is part No. 58 which pairs with the No. 56 indent that is right under part No. 57 of the action. Part No. 57 easily comes off as soon as the main pin, No. 61, is removed.
The next spring is part No. 80 which pushes the No. 79 indent that holds the safety decocker lever in place.

The third spring to keep track of is part No. 55 which pairs with the No. 56 indent that puts tension on the No. 54 trigger bar.
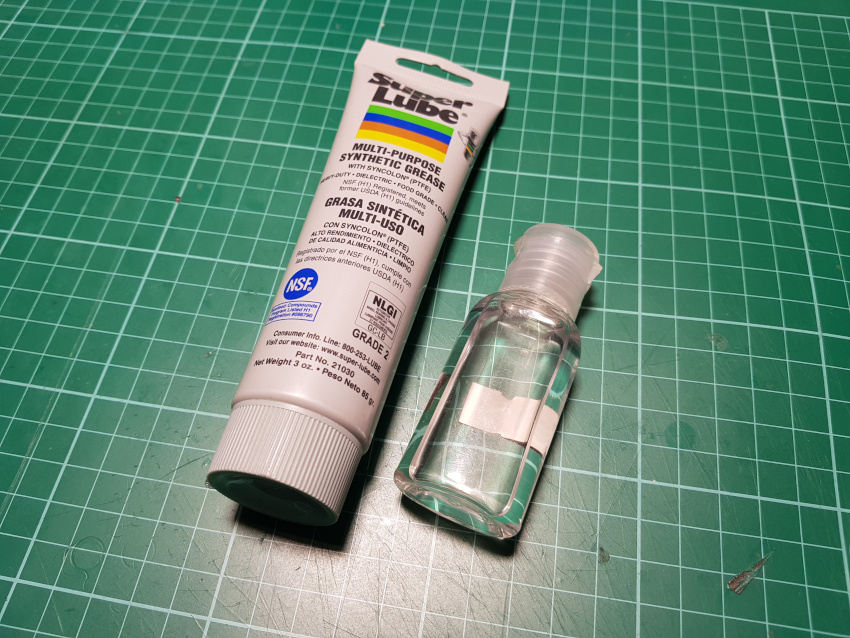
Use of Grease and Oil
When lubing the GBB use grease sparingly. Unlike real firearms, airsoft replicas are not as forceful and the weight of grease may hinder operation significantly. Use grease on surfaces of the action where the finish has been worn and then apply silicone oil everywhere else. Apply a tiny amount of grease on the frame slide rail corners and silicone oil on the length to keep drag to a minimum.
Removing Blow Back Housing
Moving onto the slide assembly the first steps involve the basic field strip. First pull the captive recoil spring and guide forward from the base of the barrel assembly and swing the retaining block away. With this done the captive spring guide and barrel can be removed leaving just the slide and blow back assembly remaining.

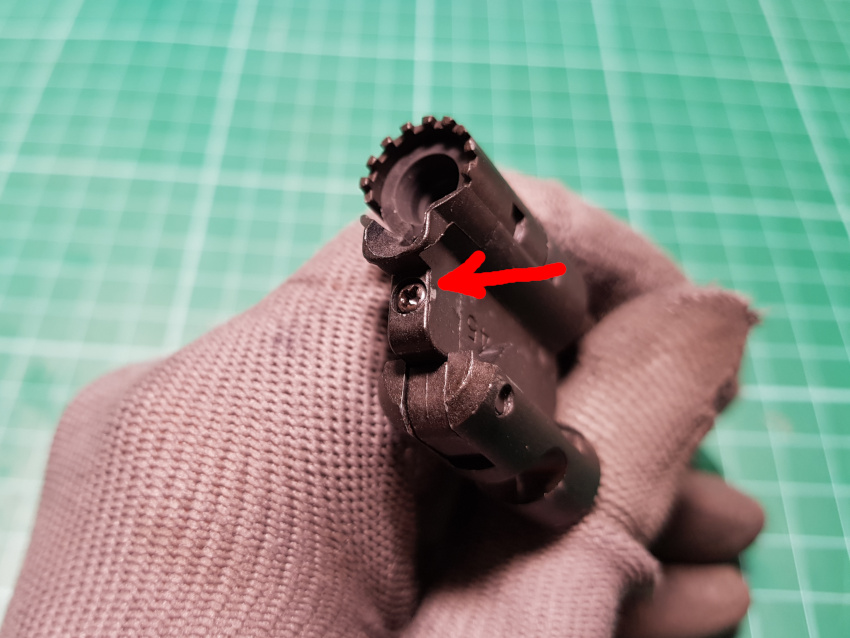
Using a 2 mm hex allen drive, unscrew the screw that runs through the housing and rear sight. Keep in mind this frees up the rear sights which easily slide off the dovetail on the top of the slide.
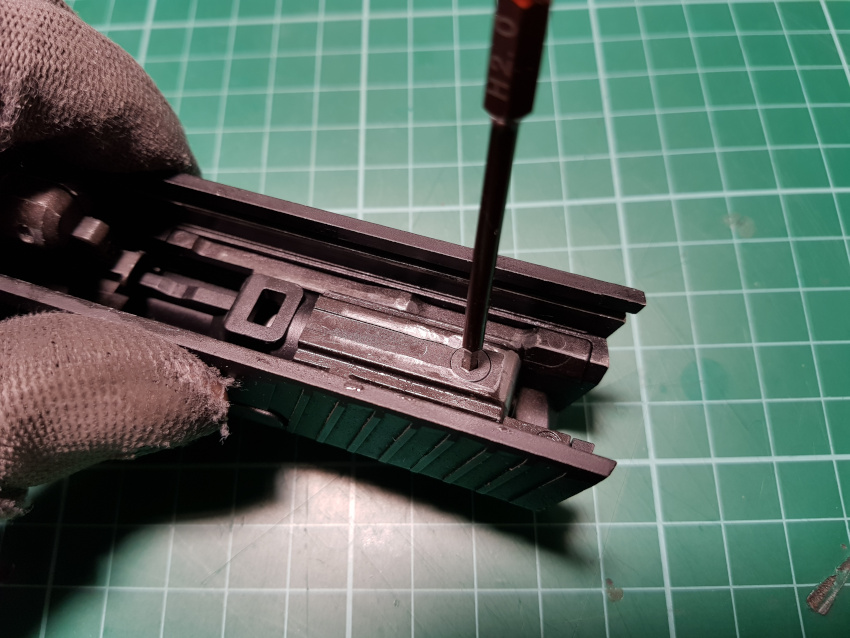
This next part requires gentle hands as to not damage or deform anything.
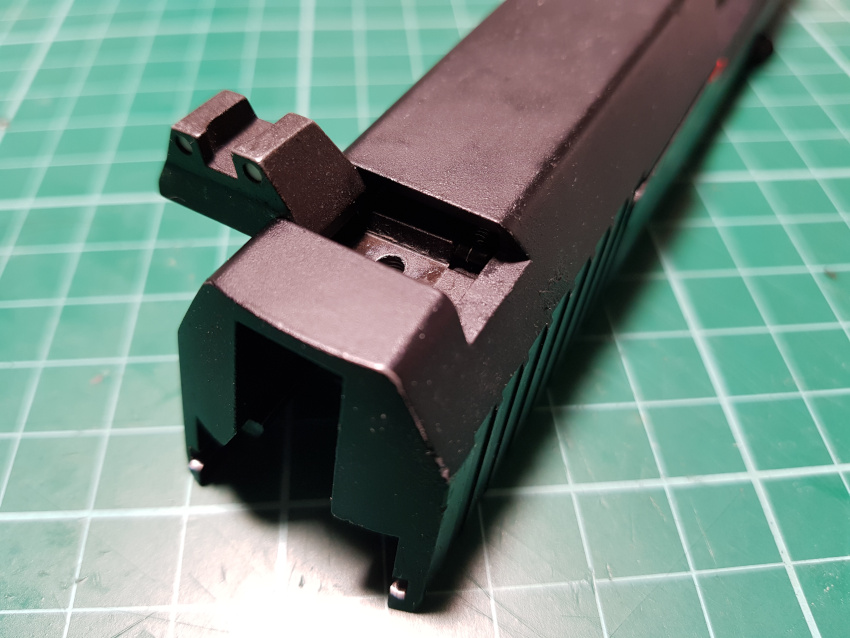
With the screw and rear sight removed, take a tiny flat head driver to the notch on the blow back hosing and gently pry it away from the frame walls. While constantly applying light pressure to lift up the housing while it is being pried, there will be enough flex that will allow the housing to free itself from the slide. Take care not to do excessive damage to the slide rails when applying leverage.
Two springs keep the nozzle on the blow back housing and undoing them separates the nozzle from the housing.

Nozzle Teardown
KSC’s nozzle design is very simple. A single pin runs across its width that acts as a stop against a spring loaded valve. All that is required is the removal of the pin to release the valve and spring.

Inner Barrel and Hop Chamber Disassembly
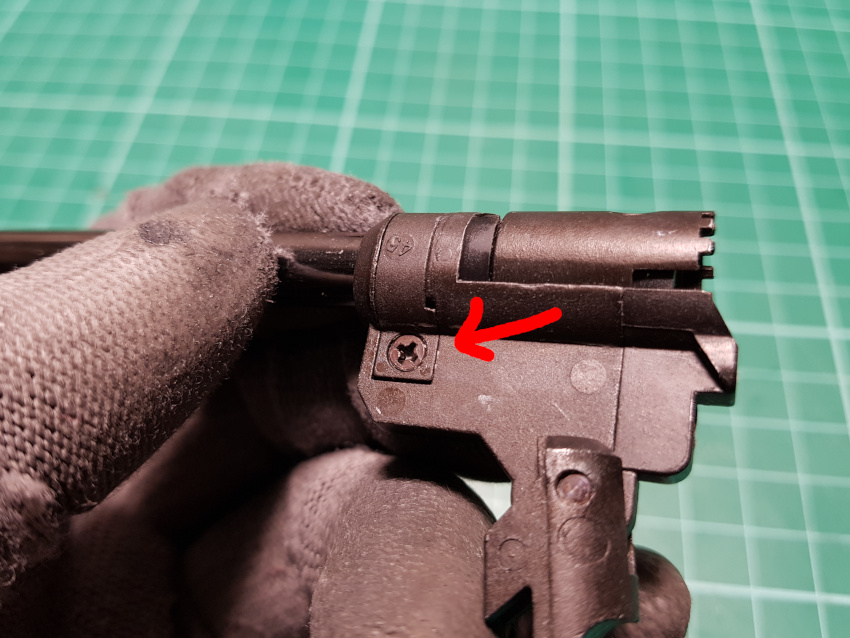
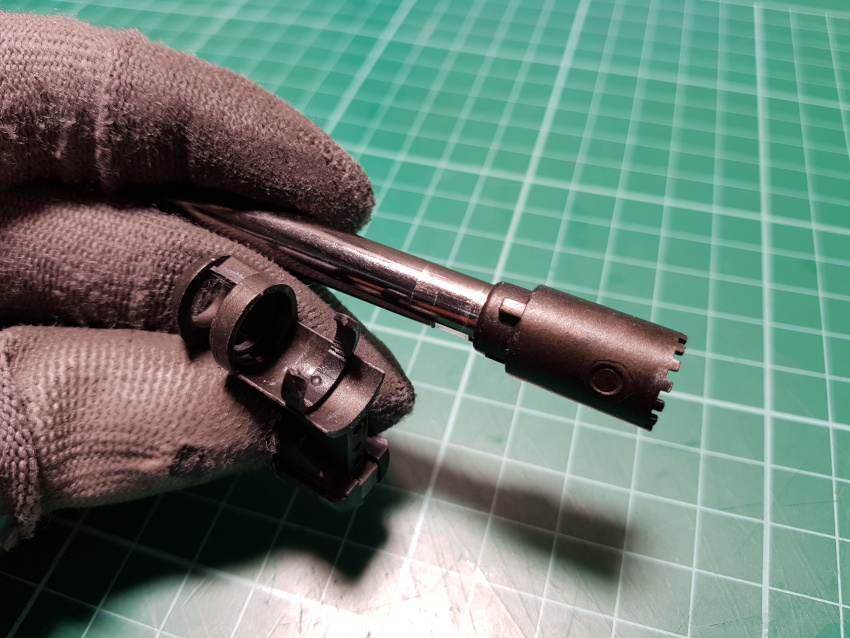
Removing the plastic barrel reveals the inner barrel and hop-up chamber assembly. To disassemble the hop-up chamber two screws need to be undone. this frees up a rear block and hook clip that frees up the inner barrel and allows it to slide out to the rear.

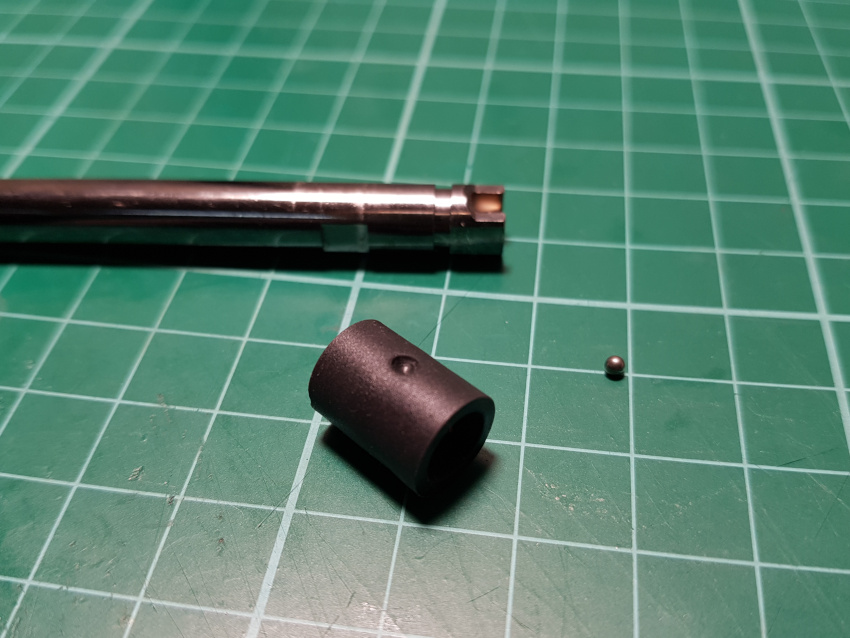
Once free, the hop collar and clip can be separated revealing the hop packing and metal ball nub. Take care not to lose the tiny metal ball or damage the plastic clip. Once these are off the inner barrel and hop chamber unit is fully disassembled.

Magazine Gas Leak
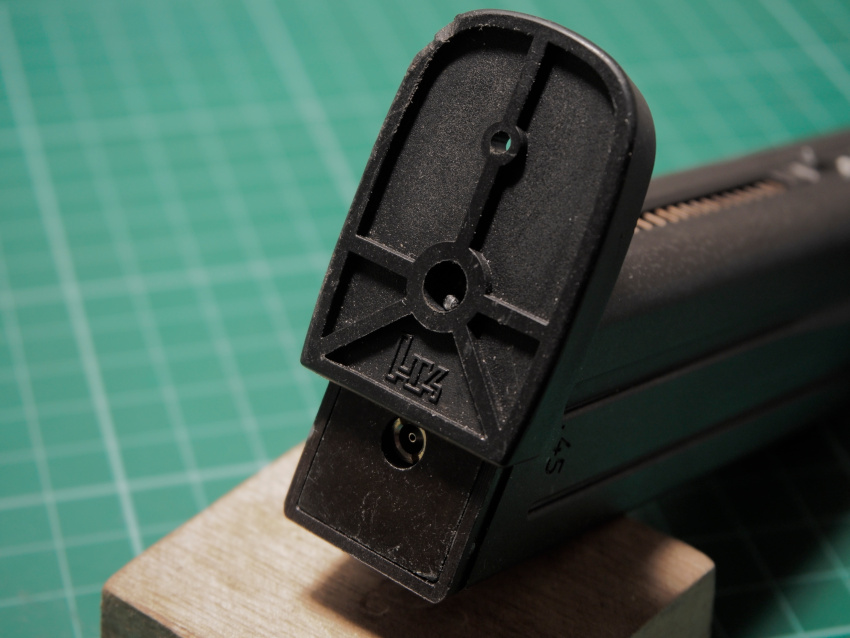
With the KSC USP slide and frame disassembled only the magazine is left. Normally this is not required. However, I noticed a pressure leak from the bottom drop plate of the magazine in the form of a light hiss. First the bottom drop plate needs to be removed by pushing the indent at the bottom in and sliding it off.
With a tool I tried to remove, clean and tighten the fill valve without any signs of improvement. Because of this I decided to inspect the whole bottom block.
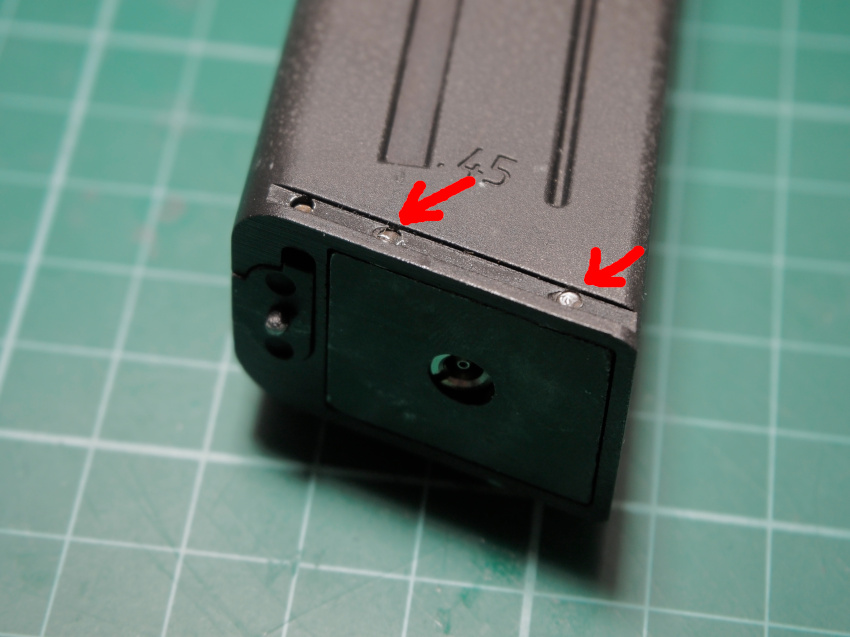
The first pin in the front along the bottom of the magazine is for the disassembly of the BB follower which does not require attention at this time. Concentrate on the two rear pins and punch them out to release the bottom magazine block.
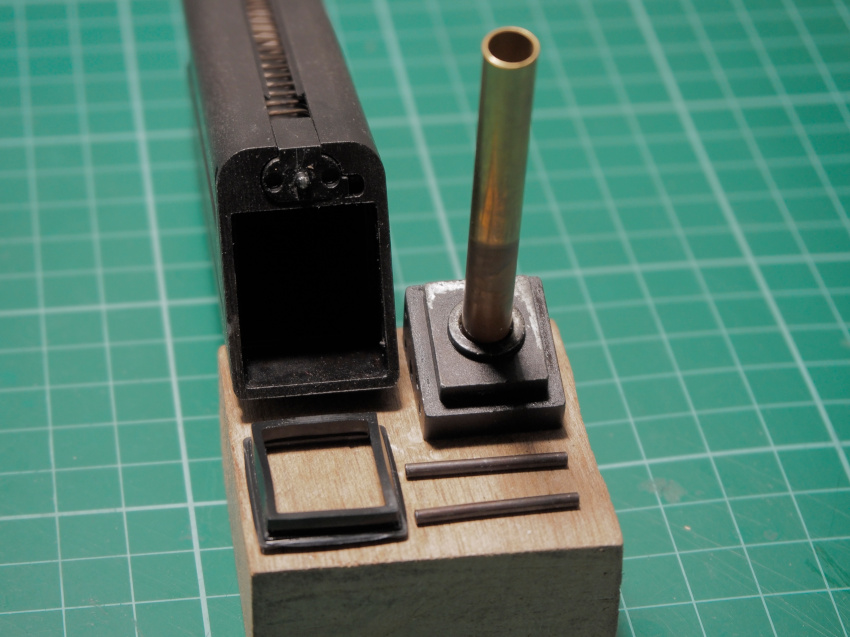
Removing the block reveals a sealing rubber gasket. It so happens that the gasket was slightly pinched on the corner which was allowing gas to escape. Luckily it was not damaged. Some light lubing and careful reassembly fixed the leak issue.
Closing
One trivia I would like to mention is KSC’s System 7 might be known in different regions of the world as KWA NS2. KSC does have a plastic slide option to cater to the Japanese market while they are also sold under the KWA brand in western markets.
Moving on, the greater majority of the KSC USP System 7 has been disassembled and reveals all major parts and surfaces for accessible cleaning, servicing, and lubing.
After sorting out the knurled dowel pin there were ZERO failures to cycle and maintain a gas charge. All controls functioned and worked as intended without causing any intermittent issues. One area I had problems with were BB jams in the hop-up chamber that occurred when gas levels in the magazine went low.
The metal ball that acts as the hop nub does not line up with the ramp on the collar and applies a constant pressure on the packing which might be causing the jam.
Thankfully the System 7 design manages to continuously fire about a magazine and a half worth of BBs at a moderate speed which means this problem can be completely avoided with some spare magazines.
Overall I can highly recommend the KSC System 7 USP and similar platforms. They look and feel high quality and have quite good performance with the only criticism being the hop-up chamber design being a little hard to adjust consistently.
Afterword
If you liked this post and found it helpful, please drop by our YouTube and social channels to say hello! Unfortunately many find airsoft a sensitive topic and are making it increasingly difficult to enjoy and discuss our hobby in more mainstream internet channels. I am going to need your help to grow our community and share the positive aspects of our hobby / sport.
You can help by telling your airsoft buddies about htwarrior.com and sharing blog entries like the one you just read. For those who want to show their support directly, you may consider donating any amount in the PayPal link below. Much appreciated!

Thank you for taking the time to read another Hobby & Tech Warrior post!
– J4
Hi, I wanna ask my KSC UPS tactical has a problem with loading and decocking the gun. I wanna ask how could i potentially solve it? thanks
Hiya. Did you mean loading BBs? That could be something to do with magazine feed lips or loading nozzle. 1) The loading nozzle might be worn or damaged making it difficult to pick up BBs from the feed lips. 2) The feed lips could be damaged or spring is weak making it difficult for BBs to push up and out the magazine.
As for the decock lever, what exactly is happening? It might need lube, or cleaning of the trigger sears. Was the USP dropped on the ground at any point?