It’s been a while since my last post. Apart from the things I am currently dealing with I have been contemplating how best to approach the new set of airsoft topics I wanted to tackle. The next topic involves testing of compression parts and I plan to break the process down to more manageable entries. First among these is a brief look into the Retro Arms upper gearbox shell for ICS M4s and my observations trying to install it. The quick spring change function that is absent on my stock upper shell will be an integral update to make future tests run smoother.
Intro Back Ground
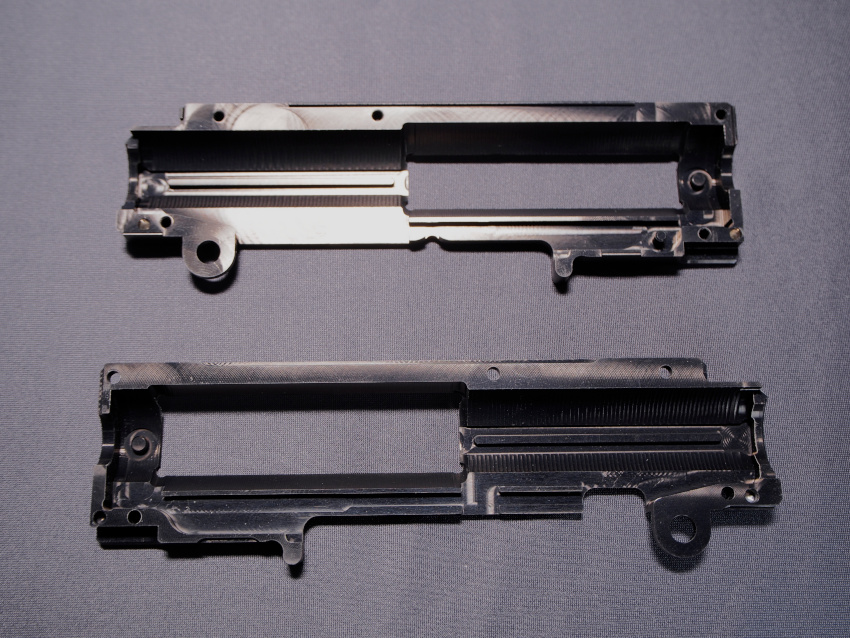
The brand name Retro Arms is known for their robust characteristics as well as some fitment issues. Despite this bipolar description the brand manages to maintain its reputation for making desirable gearbox shells. Unfortunately Retro Arms only makes the upper half of the ICS gearbox shell. A lower half would make a nice pair for an all black set. Maybe one in 8 mm bushings.
Regardless, the stock ICS v2 shells are not known to break easily and most of the downsides are in the dull finish and limited quality of life features on the older models. Back then spring decompress and separable upper and lower gearboxes were already big deal features. Because of the stock model’s highly capable nature, there was little reason to change it. Apart from ICS themselves, Retro Arms has been the only manufacturer to provide an aftermarket gearbox option for users of the ICS m4 series.
Weight, Finish, and Texture
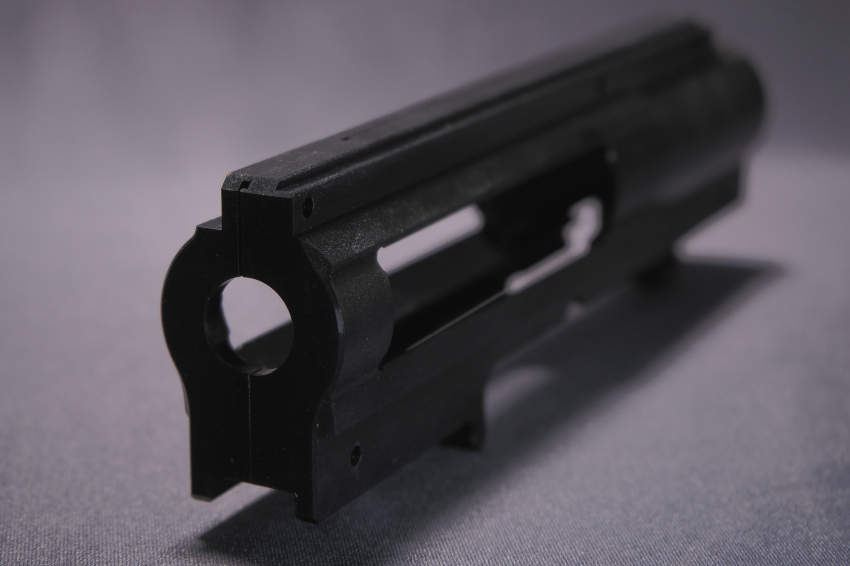
The first thing I noticed when handling the Retro Arms shell was how light it was compared to the stock shell. This is probably due to its aluminum construction. Machining mark patterns are present which gives it a pleasing appearance and the glossy black anodization provides light wear resistance. This finish tends to attract oil and fingerprint stains so be mindful to wipe them off to slow down its deterioration.
Details & Features
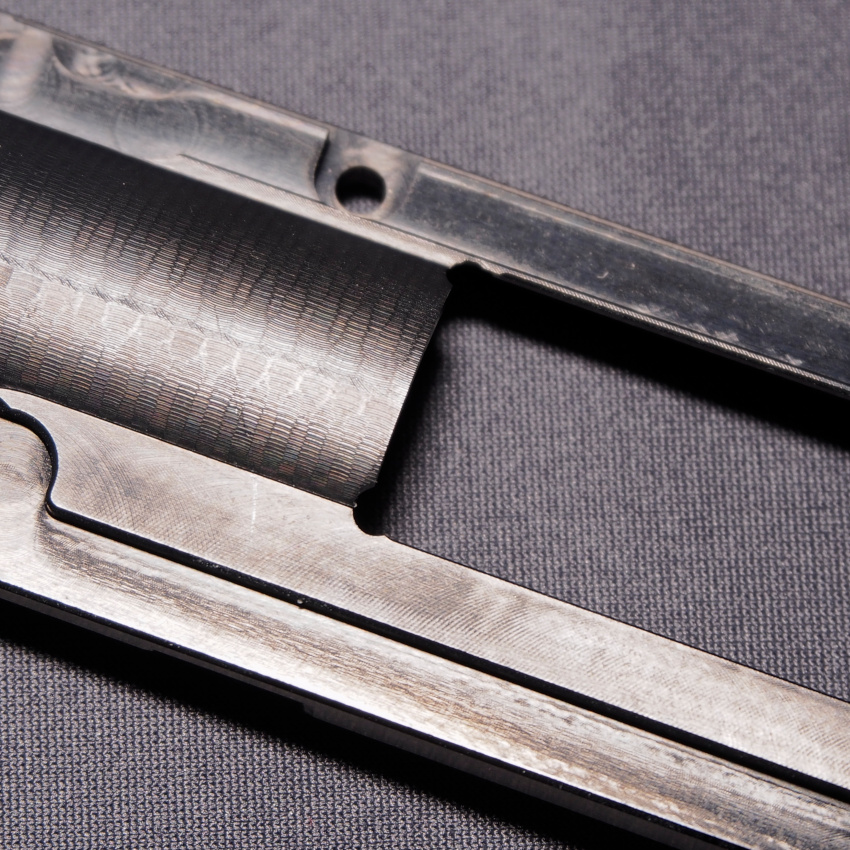
The largest difference can be found in the dimensions. The original shell has a contoured bottom that curves towards where the the lower gearbox would be, while the front has an upward sweeping arch. These curves are absent on the Retro Arms shell.
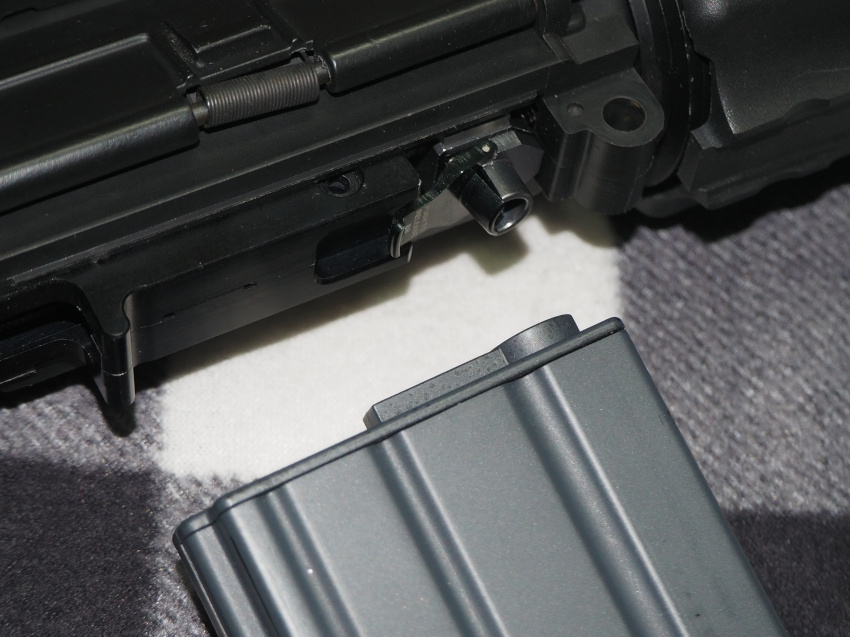
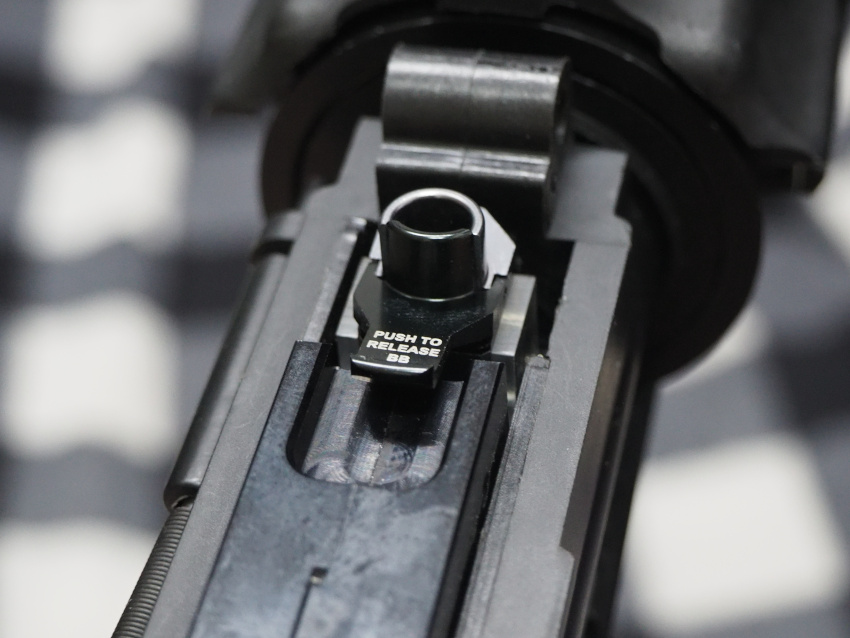
Unfortunately for the PRO versions of the MAXX Model Co. hop-up chambers, this blocky front profile design interferes with the BB release lever function and doesn’t give it enough room to operate properly and seat a magazine. Detailed pictures of this problem can be found in the hop-up section of this write-up.
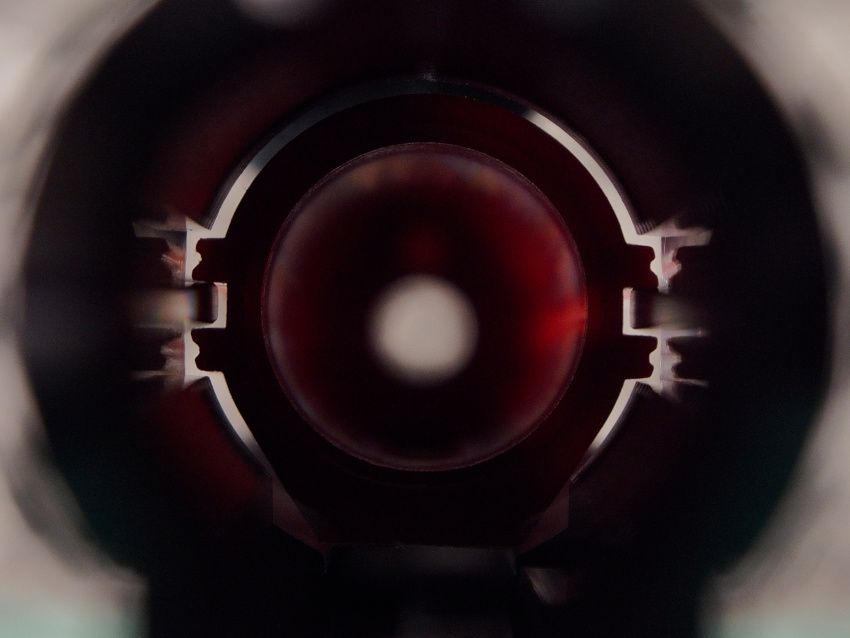
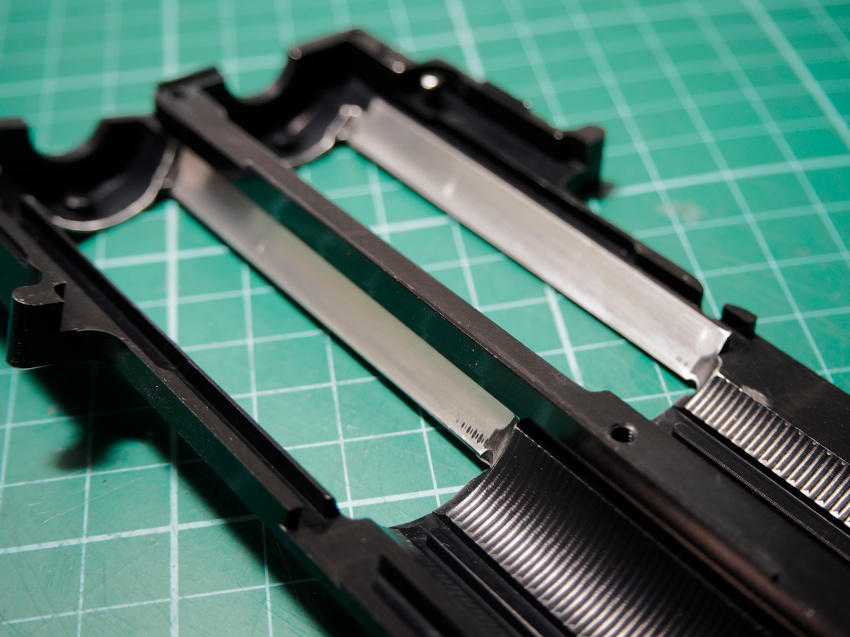
Cylinder Window Radius
The cylinder windows also come pre-radiused. The rounding off of the cylinder window corners is known (with limits) to disperse shock over a wider area and reduce the chance of fractures developing in case a heavy main spring is used.
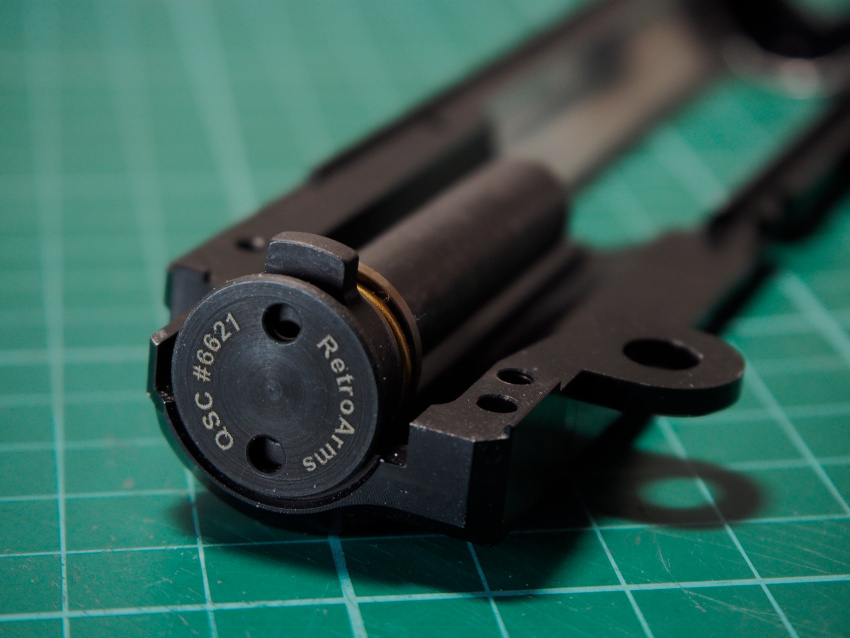
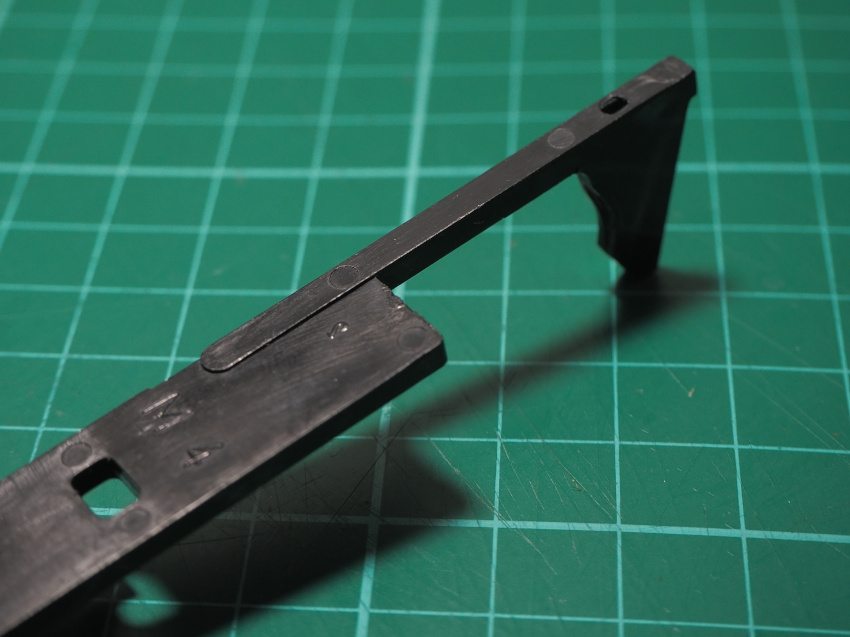
Quick Spring Change
The quick spring change function or QSC is also available on this shell which allows easy swapping of the main spring. What makes it different is that a low profile screw plate is available that secures the spring guide rod against the shell for more stability.


Fit & Tolerances
What I was keen on investigating was how well internal parts sat in the shell. There was a disclaimer on the Retro Arms website that instructs to avoid using a MAXX Model Co. cylinder head due to the way it sat against the cylinder head locating extrusion tabs which lead to premature damage to the shell.
Cylinder Head
I used a Lonex v2 LMG Cylinder Head that rests flat against the gearbox without leaning against the tabs. This distributes the impact force throughout the front of the shell instead of concentrating it on the tabs.

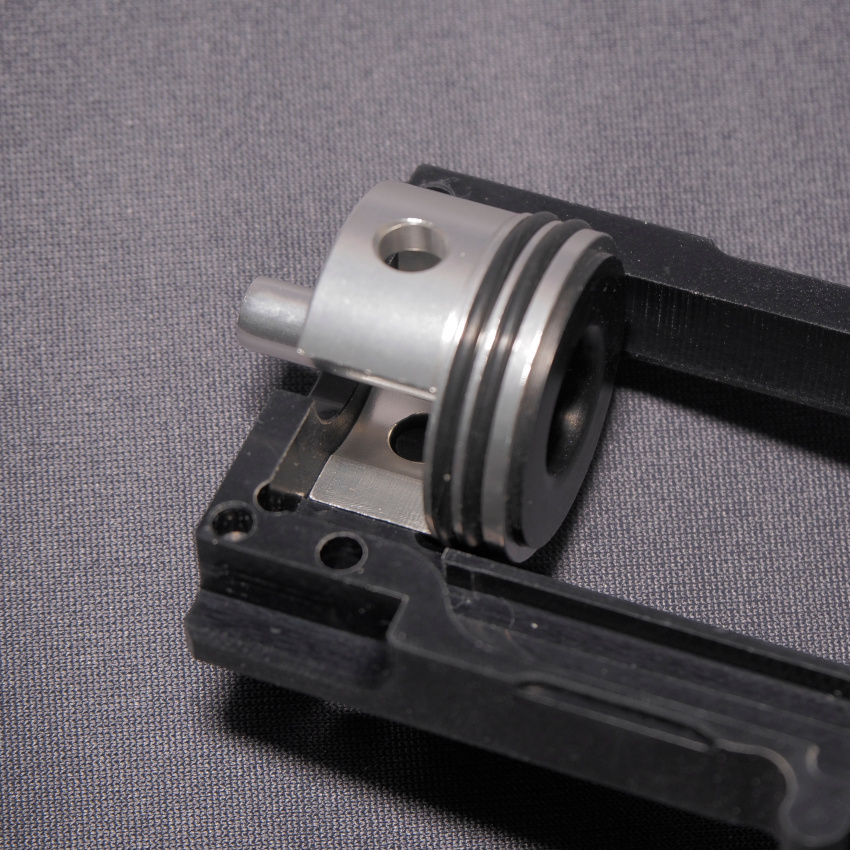
Piston Body
For testing the piston body clearance I used a Lonex Extreme Toughness Red Piston. There is ample clearance for it to freely glide along the gearbox rails without having to polish them. This means that drag is minimized during its travel.
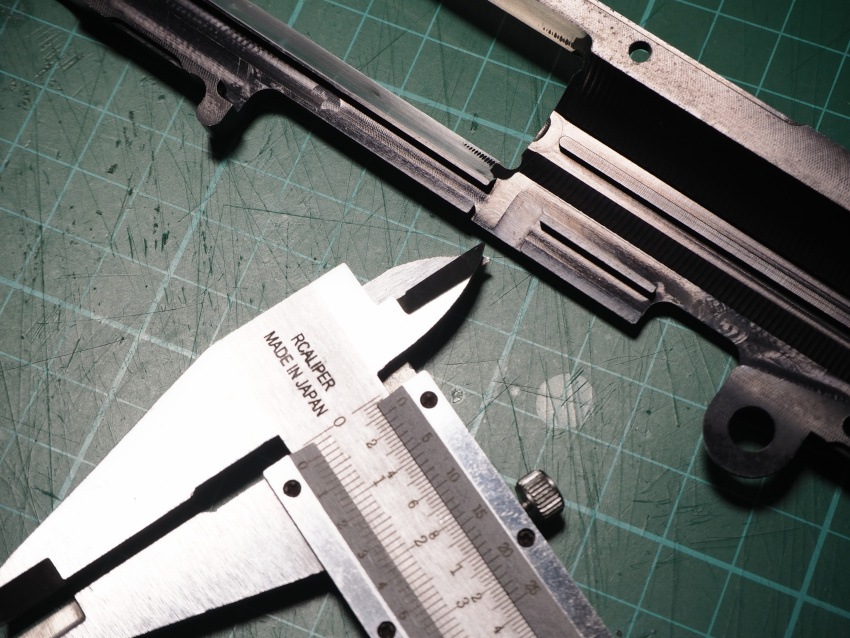
Tappet Plate Rails
The tappet plate rails have have a gap of about 2.60 mm. This should fit most aftermarket tappet plates with standard bridge designs, however you will encounter problems with the stock legacy ICS m4 tappet plate that has a reinforced bridge. The reinforced bridge on the stock ICS m4 S-System has extra material that makes it too thick to run freely on the rails. I could attempt to sand down the reinforced section of the bridge, but I imagine keeping it level and uniform will be difficult.
Cylinder Troubles
Where I had the most trouble was with the fit of the cylinder. I must have used four different cylinders and no matter which one I used the shell refused to close. The cavity for the cylinder was undersized and the ribbed pattern left by the machining also misaligned the way they sat when I used a ribbed one. A guarder bore up cylinder managed the least gap between the shell halves, but was ultimately still unusable without modification to the cavity itself.

Fix to Fit the Cylinders
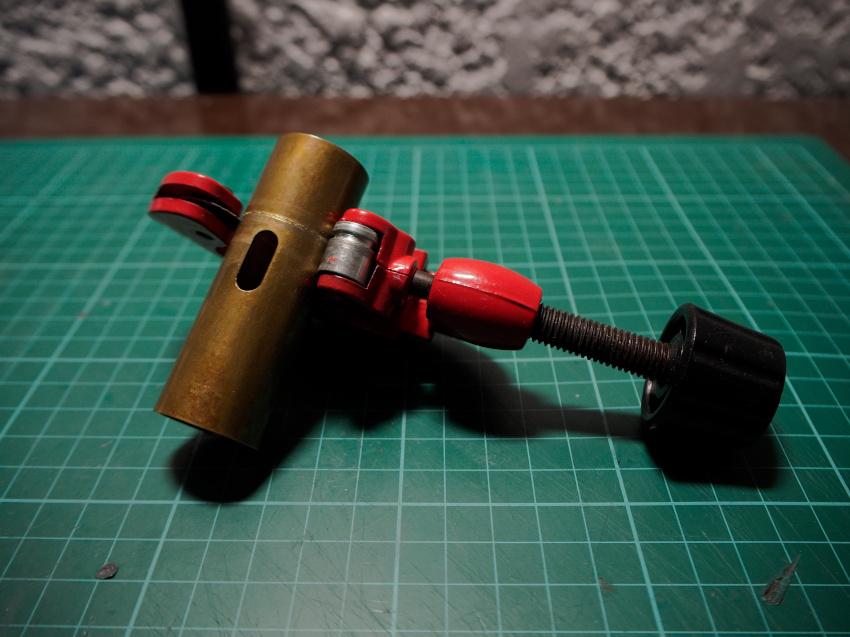
My solution to the cylinder issue was to sand down the high spots on the cavity until the cylinders could fit. To do this, I cut out a section off of a spare brass cylinder to act as a guide, and wrapped it with sand paper to use as a sanding block.
While sandwiching the piece between the shells, I started the sanding process with 400 grit sand paper and eventually made my way up to 1100. A lot of the machining marks and anodization were removed from the cavity, and the gap between the shell halves while a cylinder was installed began to shrink. The process is very time consuming and tedious, but it eventually allowed the gearbox shell to close with any of the remaining cylinders I owned inside of it regardless of make and type.

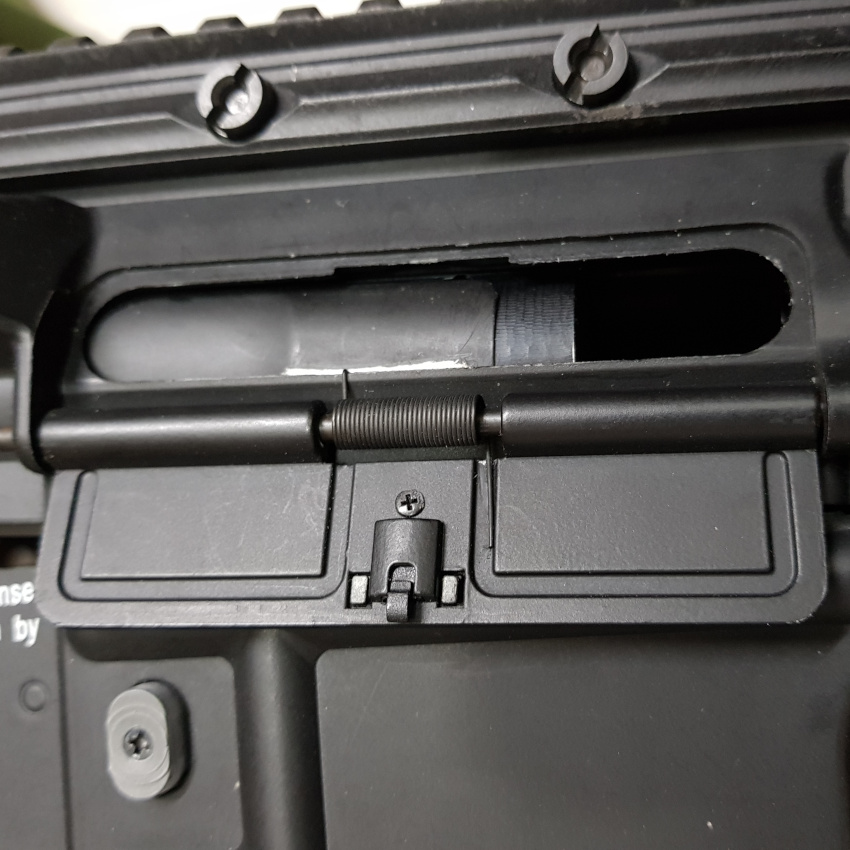
Fit in Receiver
The final test is to check how well the Retro Arms upper shell sits in the upper receiver and meshes with the stock ICS lower gearbox. It was a bit of a concern at first because it seemed that the shell would get stuck against the mock bolt plate that is screwed onto the mock charging handle, but with a bit of coercing the plate slid over the Retro Arms shell. My receiver is the plastic type so I was able to easily flex the receiver wider to make room to slide things in. I can imagine this may be more laborious on a metal upper receiver.

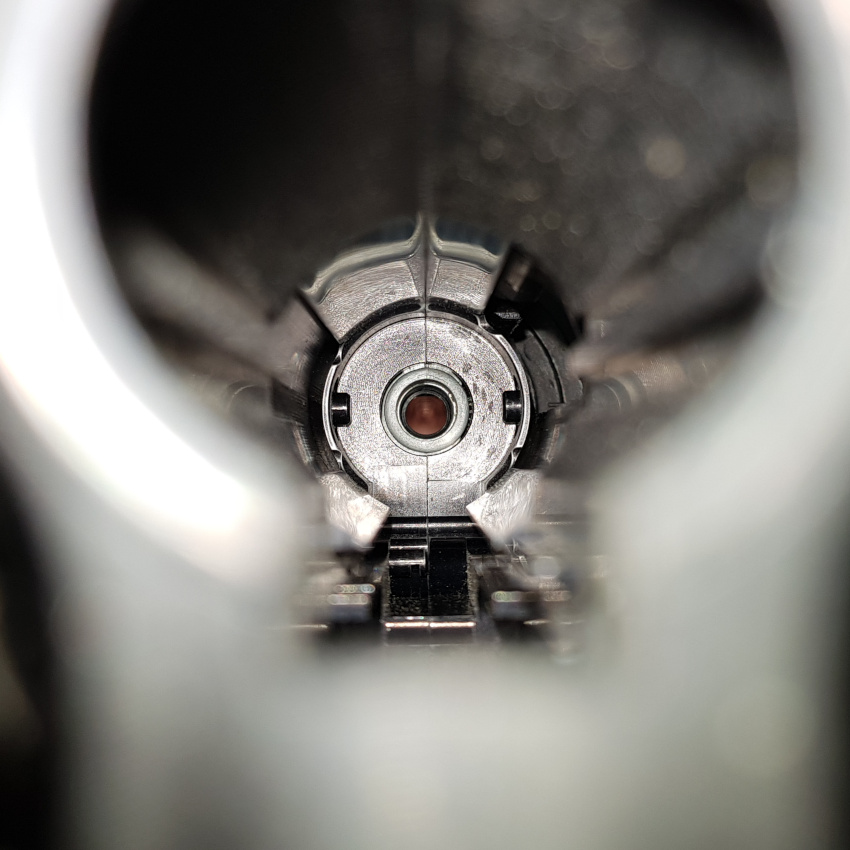
Hop Up Alignment
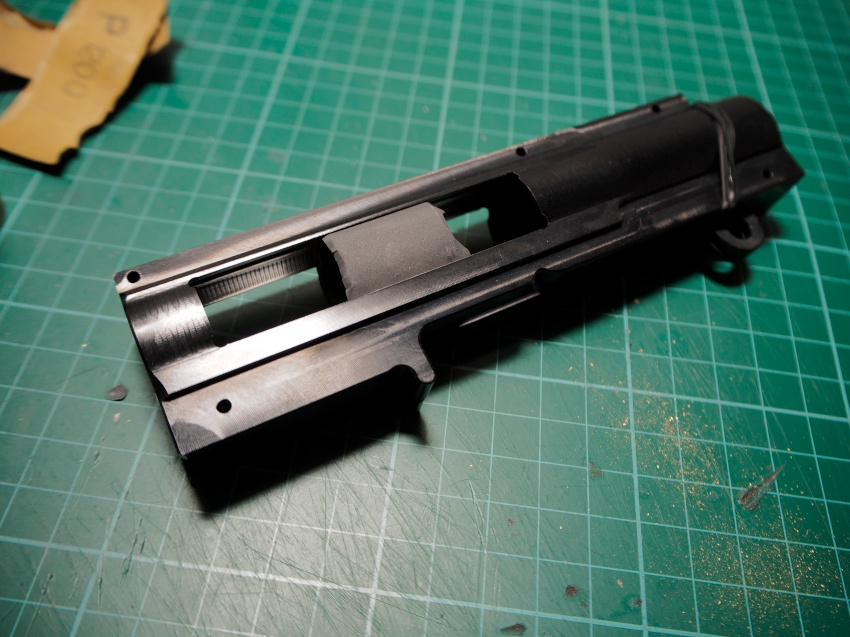
The hop chamber I have is a Deepfire chamber that is slightly modified to fit the receiver. The hop chamber’s compression spring adequately pushes the chamber against the Retro Arms ICS upper gearbox shell allowing it to sit flush. This helps the odds of getting a good air seal. Looking through, the shell does align well with with the hop-up chamber sitting relatively centered.
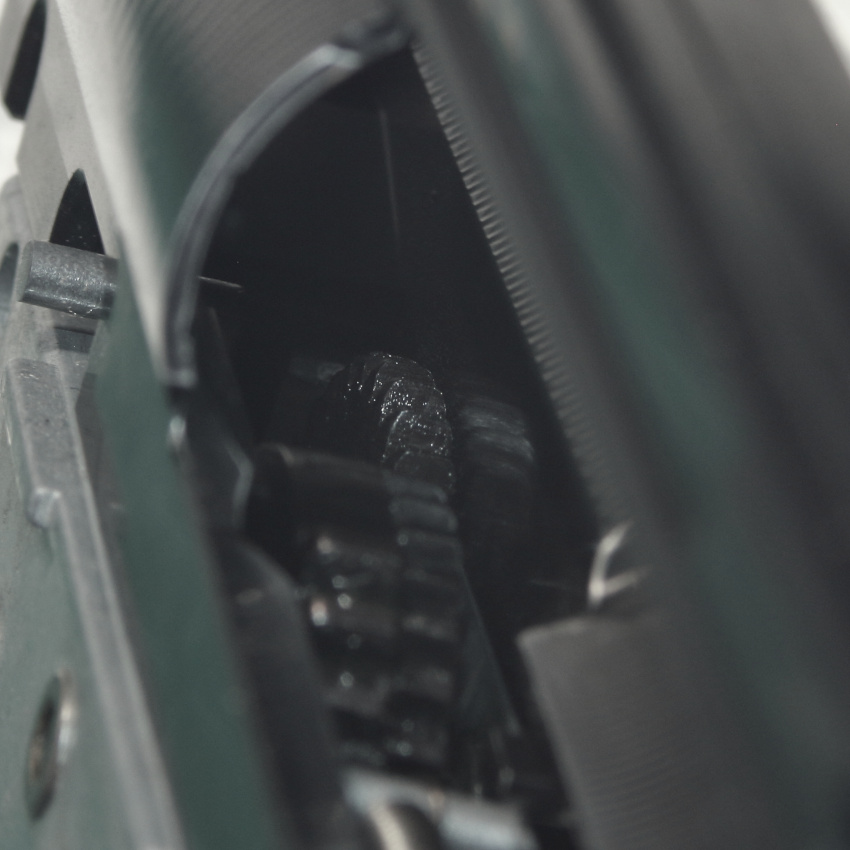
MAXX Hop-Up Chamber PRO version, BB Release Lever not compatible
As mentioned earlier the MAXX Model Co. Pro series hop-up chambers feature a bb release lever which is not natively compatible with the Retro Arms ICS upper gearbox shell design. My model of the MAXX chamber is an old version of the IE Pro. The Retro Arms shell’s dimensions do not give the lever enough room to swing open and accept a magazine. One solution may be to mill a deeper recess into the Retro Arms ICS upper gearbox shell. Otherwise the Sport variants of the MAXX hop-up chambers should be 100% compatible because they forego the BB release lever for a more traditional BB feed tube.

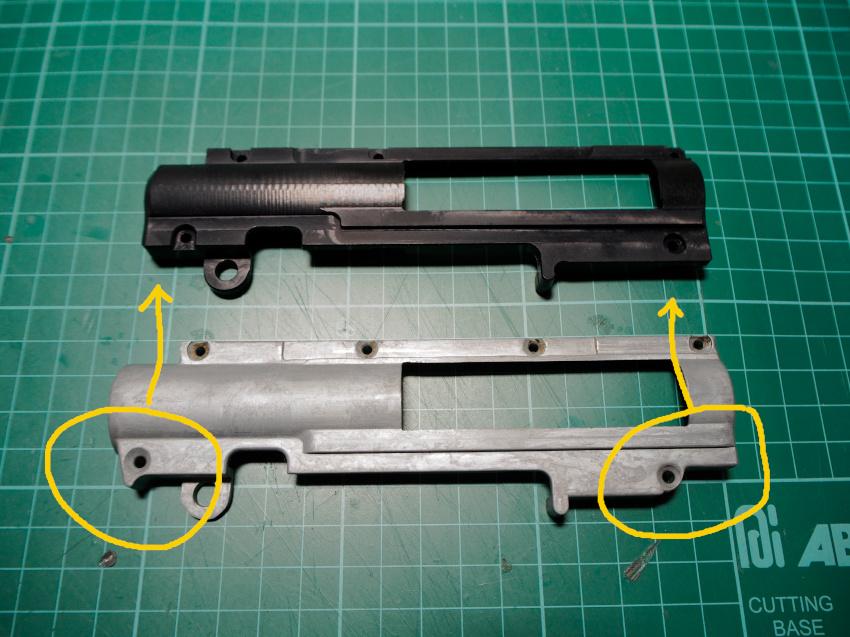
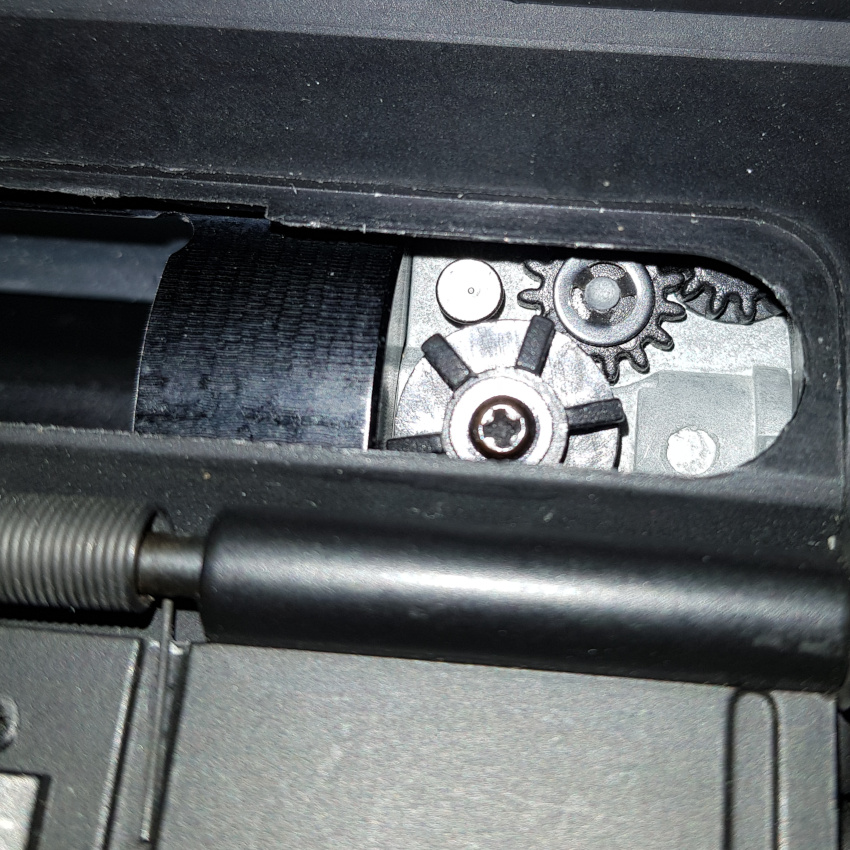
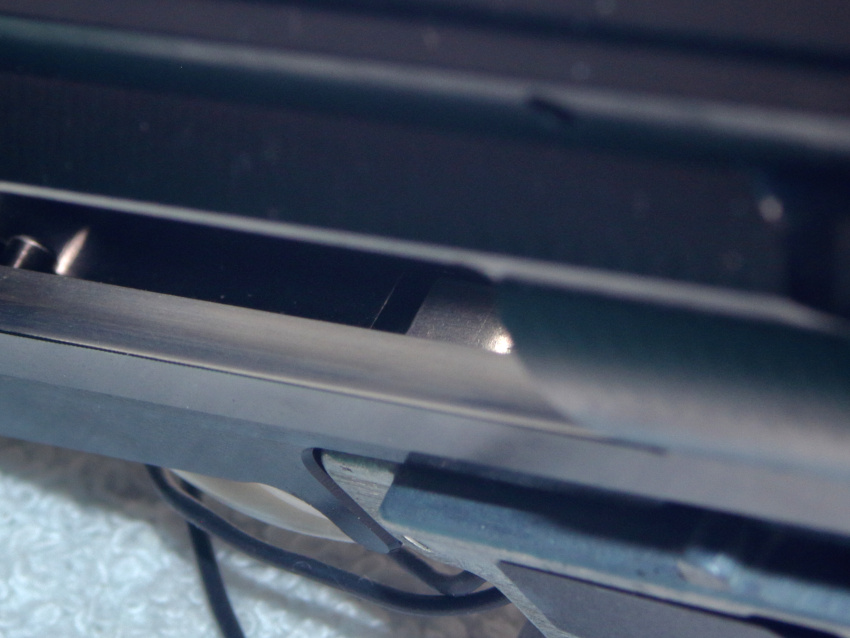
Rear Captive Pin Block is tight fitting
The rear pin block on the Retro Arms ICS upper gearbox is a tight fit against the stock lower gearbox shell. However, it does manage to slide in making it difficult to undo if not modified. Loosening the rear screw on the lower gearbox will help release it, but that isn’t a secure solution. Some light surface sanding on the receiver pin block faces will make it easier for it to fit in and out of the lower receiver.
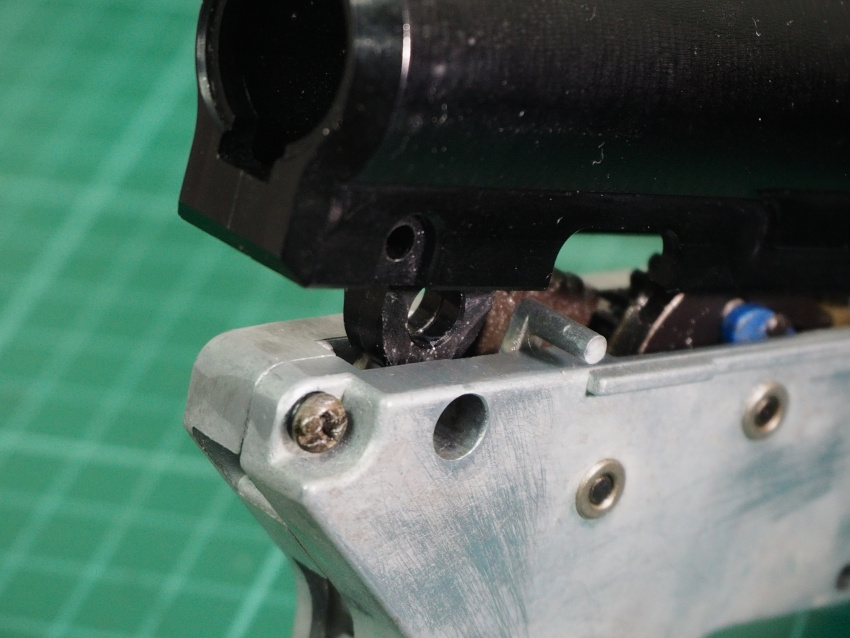
But before you think about and decide to do it, check out the clearances of the spur gear and sector gear tappet cam against the inner walls of the Retro Arms shell and avoid removing excess material that will introduce play to the rear end of the upper shell.
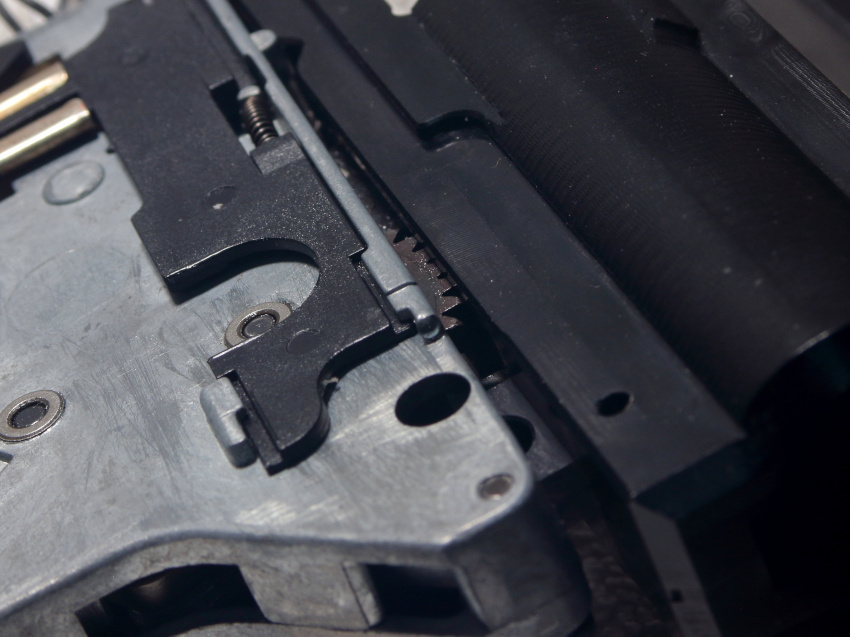
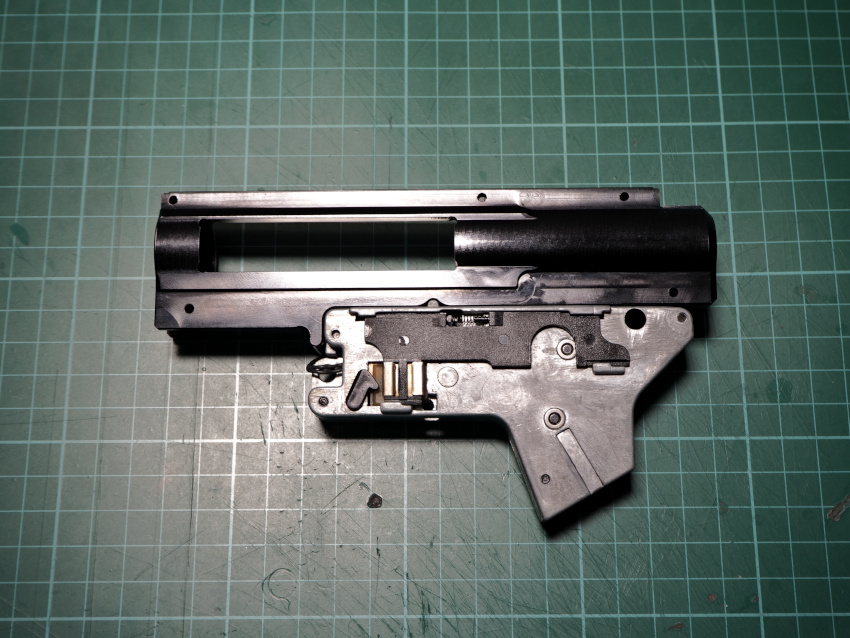
Here is a better look at both sides. The Retro Arms ICS upper gearbox shell has very good tolerances in terms of internal alignment and interference with the moving parts inside is kept to a minimum.
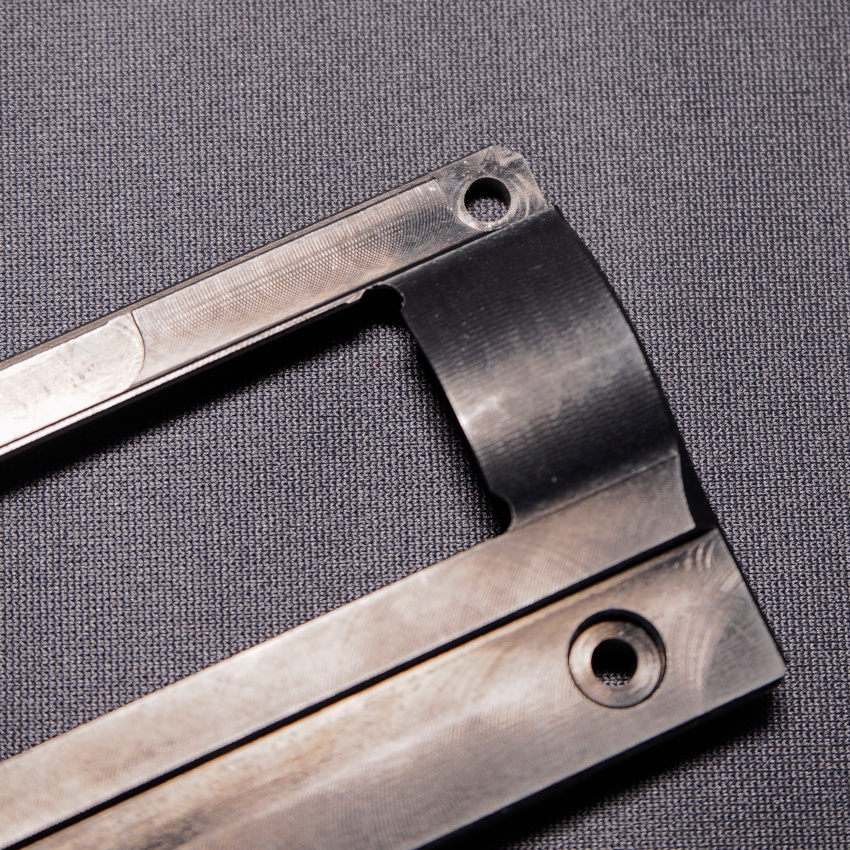
Front Locking Latch
Finally, the ICS split gearbox design uses a spring loaded swiveling latch that catches on a shelf formed on the upper shell to align and secure it with the lower shell. Without having to do any modifications I found that the latch does its job and is fully compatible with the Retro Arms ICS upper gearbox shell.
Summary
Retro Arms makes a compelling aftermarket choice for a replacement upper shell. However, installation of a cylinder can require a considerable amount of labor. Second MAXX Model Co. hop-up chambers have become popular these past few years and compatibility with the Pro chambers is an issue.
I have read that there are cylinders that fit Retro Arms gearboxes without modification, but none of the four I had worked with it. The problem I have with this is that cylinders are very standard parts across most AEG variants and gearbox versions whose fitment shouldn’t become a concern. The fact that this normally simple task became such a laborious endeavor is very off-putting.
With regards to the compatibility of the MAXX hop-up chambers, individuals seeking the captive BB feature on magazine release will be forced to consider running the stock ICS gearbox or having to chip out material from the Retro Arms shell. Otherwise, MAXX Model Co. does offer a SPORT version of their chambers that do not have the captive BB release lever feature.

As it is I do not like how the Retro Arms ICS shell can put you in a spot where you have to choose between options and features, but recognize that it might be the cost of ownership. What makes airsoft AEGs great is the number of options available in the aftermarket and the variety of combinations available. The trouble of installing parts isn’t a problem if you are resourceful and willing to find ways to get things to work. I just wish that they would avoid making an otherwise easy processes difficult because it can become a deterrent.
Even so, having an option is better than no option. It is just sad to see that the extra effort required in some cases can make an appreciated niche option less profitable for the manufacturers and thus less likely to motivate them to make more. (UPDATE: As of September 3, 2021, I could no longer find the ICS upper shells for sale on the Retro Arms website.)
In the case of the Retro Arms ICS upper gearbox shell, it is an exceptional replacement. Compared to my legacy upper shell, the QSC function and secure design is a welcome upgrade. I would even say that it is superior to ICS’ own quick spring change design found on newer models because of the stable nature of the spring guide rod fastener.
Apart from the cylinder issue and compatibility with MAXX Pro hop-up chambers, the fit and tolerances are great and the shell falls exactly into place with high precision. It has a catchy look and finish, and just knowing that you have an aftermarket piece that differentiates your AEG from the rest can add that extra level of flair.
So do I recommend the Retro Arms upper ICS v2 shell? Yes, with reservation. If you are willing to jump through the hoops, why not? But if you want the most compatibility with little effort or extensive modification, just stick with the stock ICS shell. Now, if only they would make a sexy black anodized lower to match. I’d take them in 8 mm bushing size and a matching selector plate please!
Afterword
If you like this post and found it helpful, please drop by our YouTube and social channels to say hello! Unfortunately many find airsoft a sensitive topic and are making it increasingly difficult to enjoy and discuss our hobby in more mainstream internet channels. I am going to need your help to grow our community and share the positive aspects of our hobby / sport.
You can help by telling your airsoft buddies about htwarrior.com and sharing blog entries like the one you just read. For those who want to show their support directly, you may consider donating any amount in the PayPal link below. Much appreciated!

Thank you for taking the time to read another Hobby & Tech Warrior post!
– J4