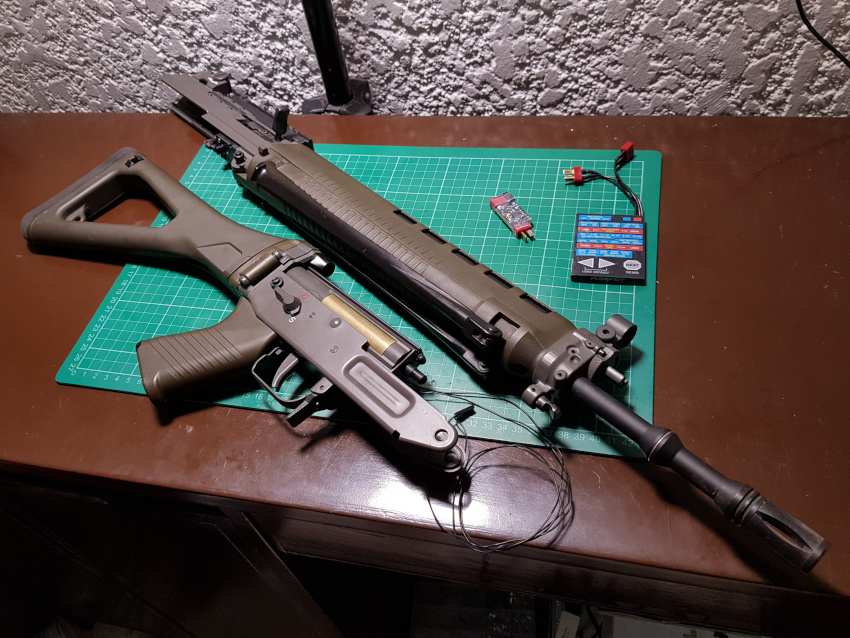
I have come to the conclusion that for my style of AEG tech work budgeting Amperes is of foremost consideration. Usually the focus is on an FPS target, a Joule target, a BBs per second target, or a range target. However, for the longest time, I have seen impressive numbers demonstrated as long as maintaining form factor was not taken into consideration. But the thing is I highly value preservation of the original aesthetic and prefer that the power source is self-contained. This imposed limitation that is inherent to the AEG’s design sets the boundaries at which I find the work to be rewarding.
Things to Keep in Mind
Thanks to my time working on a friend’s G&G GS550 I was finally able to explore this methodology. When the weight of the main spring goes up more Amps are drawn from the battery. Speed gear sets increase current draw for improved cycle rate while torque gears lower it at the cost of the same. Torque motors are also more efficient with current draw, but restrict rate of fire while speed motors tend to draw more. Finally, the chosen battery can either provide the power to operate the build effectively or not.
What Was There Before?
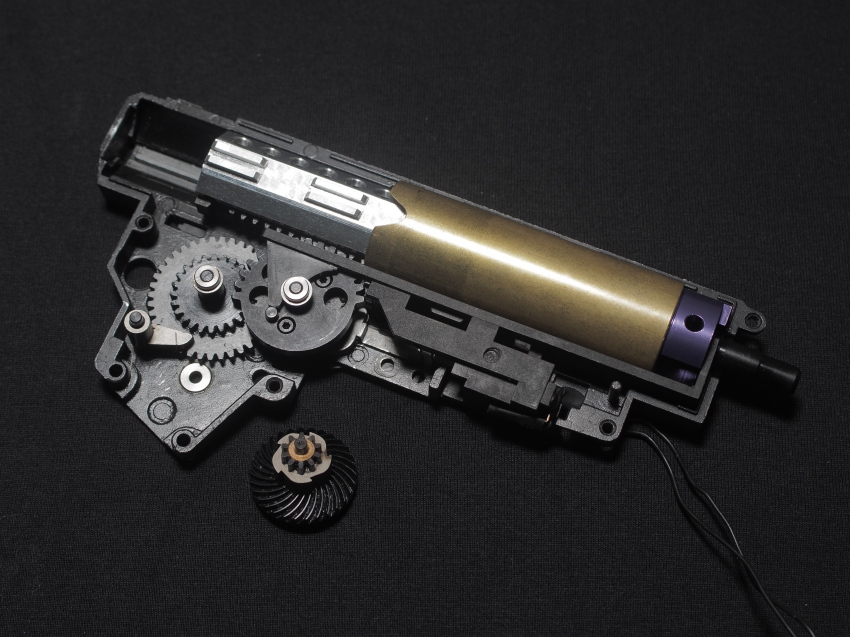
Based on the parts installed in this AEG, I would say it is somewhat of a relic. If you look at the gear set, they are the slow 36.82:1 high torque variant. The motor, a Classic Army Blue Extreme, had strong magnets with a 24 TPA armature, and is also known to be a slow torque variant. I found the abundance of torque a strange pairing to the weak mainspring readings of 366 to 372 FPS. Maybe even 392 if the leak was fixed.
In my opinion there’s too much speed loss in the drive train for that level of muzzle velocity readings.
Regarding the circuit, there was no MOSFET, which isn’t really much of a concern because of all the torque brought by the previous components. However, it would have helped to facilitate the circuit’s operation and longevity if it had even a simple one.
The battery is a 11.1V 1500 mAh, 15C LiPo battery. Prior to this project I had no gauge as to what kind of power this battery provides, but I hope to make the revelation apparent as you read further into this post.
Battery
For batteries the choice is made simple. The idea is always to get the highest capacity and discharge rating your storage compartment will allow.
There will be two considerations. That is battery pack Voltage and Amp Headroom. Voltage is just the pack’s power. Higher voltage usually results in the motor spinning faster. However consider the state of the wiring, motor, and any electronics if they can handle the Voltage without breaking. So far I’ve seen car batteries and 14.1V LiPo packs used to run AEG builds. As you can guess, the size becomes a problem as you go up in Voltage. Since I like to preserve form factor, the best likely balance are 11.1V LiPo.
The second consideration, Current Headroom, is arguably more important. This describes how well the battery pack can deliver the power on demand. If this value is low then the motor may not get enough juice to spin up heavy loads properly.
The equation to calculate a LiPo’s current headroom is :
Amp Headroom = (Capacity in Amp Hours) x C Rating
or
Amp Headroom = (mAh x 0.001) x C
The variables required to determine this is usually printed on the stickers on the battery itself. So if we take the battery that came with the GS550 it would look something like:
11.1V @ (1.5 mAh x 15C) or 11.1V @ 22.5 A headroom.
This battery would supply the build reliably up to 22.5 A.
The higher the Amp Headroom a battery has, the better it can support the current draw as it rises when load is applied. If the battery comes up short on this department, the cycle may become sluggish. Think of a dam with two holes for water to pass through. One small one big. If the small hole is too small it may not spin the turbine at all.
Be Motor Specific
This is an area that I am still exploring myself. I will expound on this as I learn more. But, with my current limited knowledge, the concept I’ve come to find important to consider is that, torque motors draw less current while sacrificing top end speed, and speed motors will turn as long as you can supply the current.
The first major consideration are the magnets found in the motor. Airsoft motors started with ferrite magnets and have since moved to neodymium magnets which are much stronger and provider better performance overall.
There are occasions when manufacturers still supply motors with ferrite magnets. Avoid these if you intend to run the motor as is. There is no reason as far as I am aware, to use ferrite magnets in modern AEG builds.
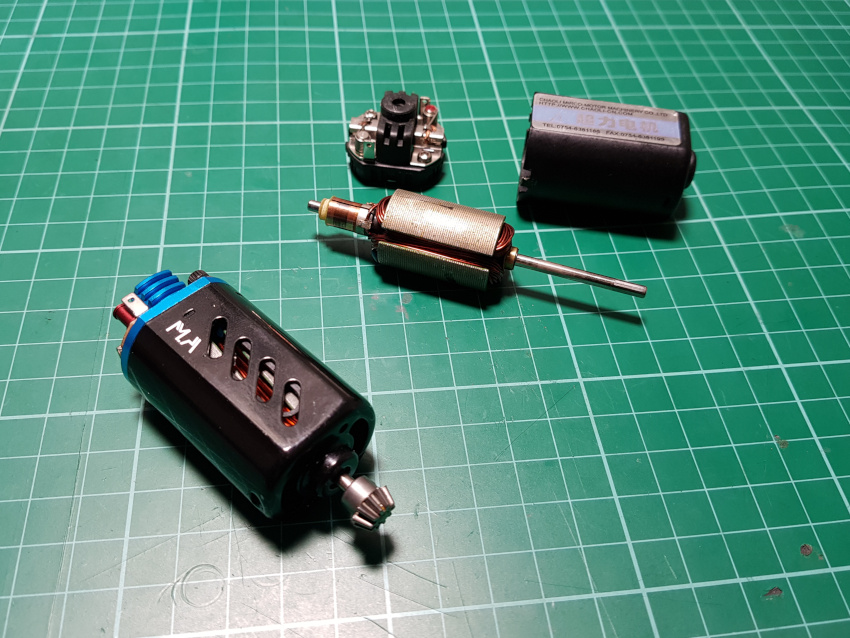
Next is the number of turns of wire on each of the motor’s rotor slots referred to as turns per armature. This will determine if it is a torque or speed type. More windings per rotor slot will skew the motor to torque and less windings to speed. There is more to this, but that will be as far as we’ll go for now.
The typical vendor with a range of motors will categorize 16 TPA as the entry into torque spec. Vendors with only a two offerings such as Jing Gong, wound their early torque motors to 22 TPA. A new player, Military Action, had the audacity to wind their torque motors to 15 TPA. There’s really no universal standard.
Because I intend to use a small battery, Amp efficiency is paramount. As of this writing I won’t have the luxury to run test on the optimal TPA required for this build to find the perfect balance between current efficiency and speed loss. I simply don’t have the budget and materials to carry out the investigation.
Instead, I went with a simple approach and modified a motor with the highest TPA armature I had on hand.
Electronics
High Voltage and current builds necessitated the installation of a MOSFET. I went with a GATE Warfet. More details about this choice can be found in this article.
The Change
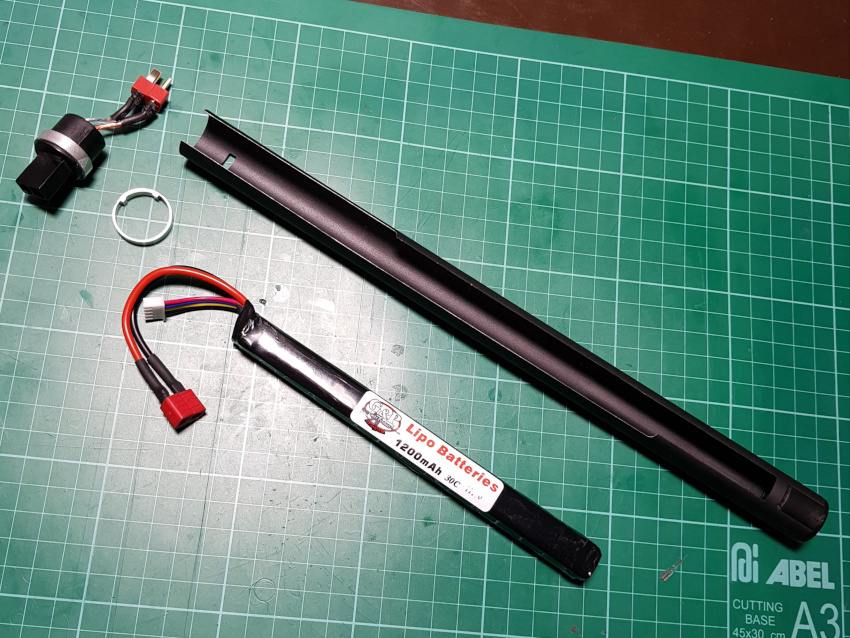
For this marksman build the spring load will be a Guarder SP150. Heavy, I know. Gears are a set of SHS 13:1 speed gears. For the motor I bought a donor that had neodymium magnets and replaced the armature with 32 TPA. I purchased a G&P 11.1V, 1200 mAh, 30C stick LiPo that could fit in the mock gas tube.
As mentioned earlier the GS550 is limited by its battery size. Going speed gears aggravates the Amp starvation. In this case, a G&P 11.1V, 1200 mAh, 30C Lipo replaced the existing 1500 mAh, 15C one to push the Amp headroom from 22.5 A to 36 A. Even though it’s less capacity, there’s a 60% increase in headroom compared to the old battery.
Finally, I used a GATE Warfet Programmable MOSFET to support the circuit and for additional features. The Warfet does four things. This build is semi-auto heavy so it prevents the switch contacts from ever arcing. Two, It actually improved the power delivery in this case for a minor boost in trigger response. Three, in active brake mode only, the spring isn’t left in a compress state. And four, pre-cock can be turned on to get the quickest possible trigger pull this build will allow at the cost of more Amp headroom and more stress to the whole system.
Conclusion
Surprisingly the build ran pretty smooth. 13:1 speed gears was able to cycle the SP150 at a considerably quicker rate than the old torque gears paired with the weak spring. My two biggest worries were the motor’s Amp drain and battery’s available headroom.
Classic Army’s Extreme motor actually has comparatively high TPA than many advertised torque motors. However it did fail to cycle the SP150 and 13:1 combination at times. This prompted me to create a franken-torque conversion with a 32 TPA armature I was saving up which managed to perform beautifully. My only regret is that I didn’t have the funds to conduct tests to find the optimal balance of resultant speed and torque this system required between 24 and 32 TPA.
The same goes for the battery. The original battery just couldn’t run the system reliably and there were times when the piston wouldn’t fully cycle. Thankfully the 160% current headroom was able to cycle the gearbox at a lower capacity. A complete cycle is better than no cycle, and I can only imagine it getting better because there’s still some space left for a slightly longer stick battery.
Most individuals can make this point moot, by running big battery packs externally to ensure enough voltage and current headroom is available. But this is exactly the gauge by which an AEG’s level of extremity is measured. At least in my eyes. At the end of the day large Voltage and large Amperage ARE expected to drive almost any load. In contrast, seeing a build operate at the edge of their limits is more extreme to me.
Even in the Warfet’s pre-cock mode the 1200 mAh 30c stick battery still manages to improve trigger response even by just a tiny bit. An improvement nonetheless. My only worry is the operational life of the 13:1 gears, but this is expected. These gears are dirt cheap and necessary at this conceptual stage. If it came to it stronger replacements are available albeit at a much higher price.
Closing
Overall, the results for budgeting Amps has been impressive. Did I mention I also managed to improve compression to +/- 0.2 to 1.2 FPS deviation? I just wanted to point out that the idea of an extreme build is relative. It’s not perfect, but It’s when you find the unexpected that makes these exercises fun and rewarding.
I’m really happy to have had the chance to work with the G&G GS550 and expand my first hand experience. I learned a lot and look forward to applying these insights into future projects and further developing my tech skills.
If you like this post and found it helpful, please drop by our YouTube and social channels to say hello! Unfortunately many find airsoft a sensitive topic and are making it increasingly difficult to enjoy and discuss our hobby in more mainstream internet channels. I am going to need your help to grow our community and share the positive aspects of our hobby / sport.
You can help by telling your airsoft buddies about htwarrior.com and sharing blog entries like the one you just read. For those who want to show their support directly, you may consider donating any amount in the PayPal link below. Much appreciated!

Thank you for taking the time to read another Hobby & Tech Warrior post!
– J4