Welcome everyone to the Hobby & Tech Warrior! In this repair log I am faced with what I thought was a misfeeding airsoft gun. Here I have my friend’s Tokyo Marui G36C, and it has a problem. The motor spins and the gearbox cycles, but the BBs don’t always shoot out. When they do, they are so weak that they bounce off tissue paper. So if your automatic electric gun, or AEG, is acting up in a similar fashion, come along on my investigation to discover one possible method of repair.
For this particular incident, I found that it was possible for a stripped piston and a separated spring guide to cause feeding issues. This combination can lead to inconsistent and insufficient compression for BBs to overcome the resistance of the hop up settings resulting in failure to fire; a semblance of misfeeding.
Listening To The Sounds
Problems with an electric airsoft gun are usually reflected in the sound of their operation. Before the culprits of the problem were revealed to me I listened in on the Tokyo Marui G36C’s operation for sounds that were out of the ordinary. Usually, there are distinct noises produced by AEGs that do not run well, and in this particular case it was producing a grinding noise.
Convention tells me that grinding noises usually involve a motor height problem or stripped teeth on either the gears or the piston body.
However, completely stripped teeth usually results in the sound of gear spin and the absence of the “thud” of a piston head slamming against the cylinder head. Since the sound of the piston head hitting the gearbox is present it means that the piston is still being pulled back and thus the gears most likely still have their teeth.
We did observe a compression problem that points the damage to be located on the piston assembly or some other combination of compression parts. In any case, the grinding noises needed to be investigated and resolved and for that the gearbox needed to be pulled out from the Tokyo Marui G36C and pried open.
Getting to The Gearbox
You will be dealing with hex patterned bolts to separate the gearbox from the upper and lower receivers so you will need to use hex pattern wrenches or drivers to remove them. As for me, I brought out a set of hex drivers I own. They have more ball shaped ends which made it easy to slip in and grab onto the bolt heads quickly and consistently without much trouble.

Moving along, the first thing I had to do was remove the magazine well so that the hop-up chamber could be accessed later on. This is done by unscrewing the end of the receiver pin on the magazine well that secures it to the upper receiver, sliding out the receiver pin, and then depressing the magazine release, and swinging the magazine well out and away from the Tokyo Marui G36C’s upper receiver.
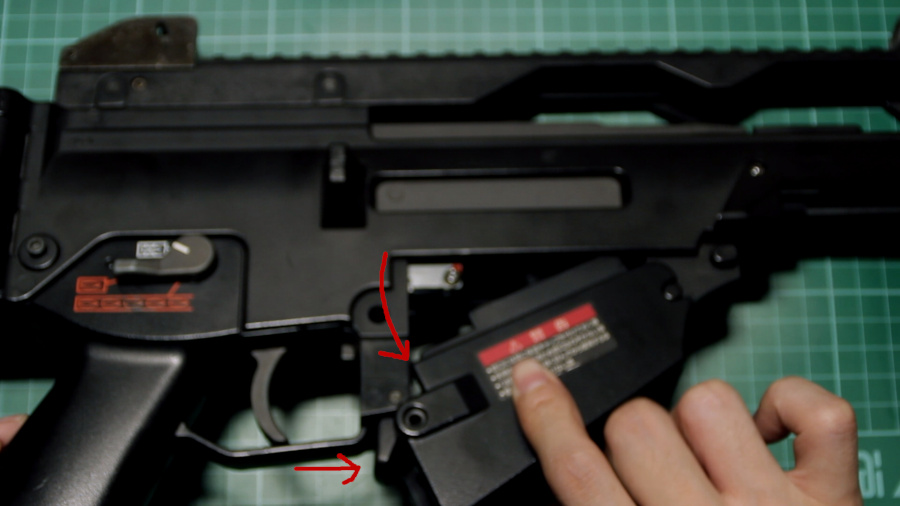
The hop-up chamber is spring loaded against the barrel assembly and the BB routing block attached to it needs to be pushed away later to free the front end of the gearbox from the upper receiver. I use my thumb here to depress the hop-up chamber assembly to show that it can be moved out of the way.
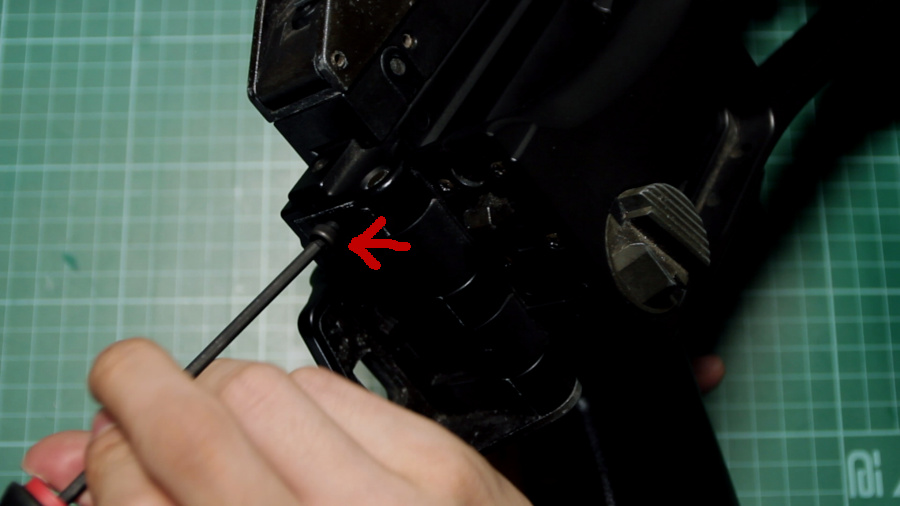
Going back, fold the folding stock into the folded position which will reveal a single hex pattern bolt behind the upper receiver. I used the right sized hex driver again from the set I own to remove this bolt. After which the stock needed to be folded back out. This single bolt that was just removed screws onto a lug that’s attached to the top of the internal gearbox that secures it inside. By removing this bolt, we have freed the rear of the gearbox from the upper receiver of the Tokyo Marui G36C.
After setting aside the receiver pin and bolts in a safe and easy to find location, prop the Tokyo Marui G36C up on its top rail with the belly of the AEG facing upward to put the hop-up chamber and underside of the front of the gearbox in view.
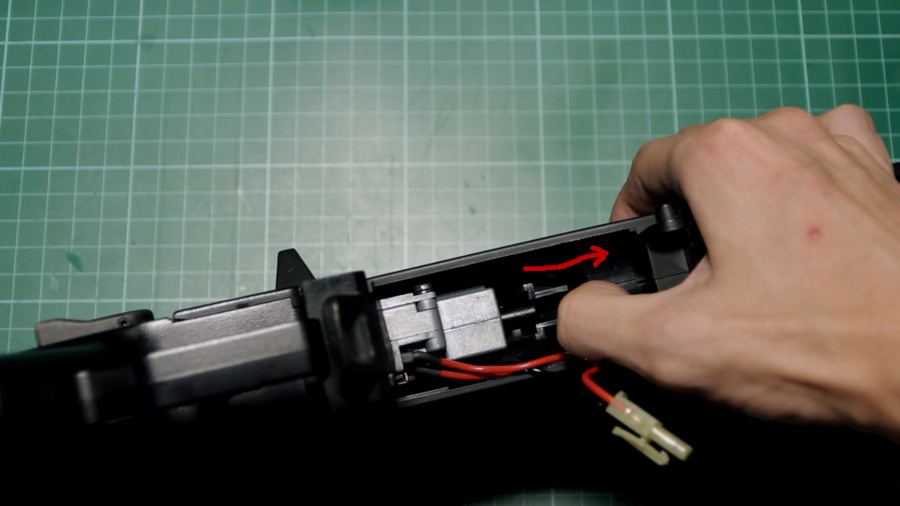
As mentioned earlier, the hop-up chamber is spring loaded against the gearbox and is the only thing left keeping it secured to the upper receiver at this point. Push the hop-up chamber out of the way towards the barrel and hold it in place. Then grab on the Tokyo Marui G36C’s pistol grip, and with the hop-up chamber held out of the way, rock and swing the lower receiver out and away from the upper receiver, releasing the gearbox with it.

With the lower receiver and gearbox in hand, unscrew the single center hex patterned bolt on the underside of the the pistol grip. A pin that holds the gearbox to the lower receiver also needs to be punched out.
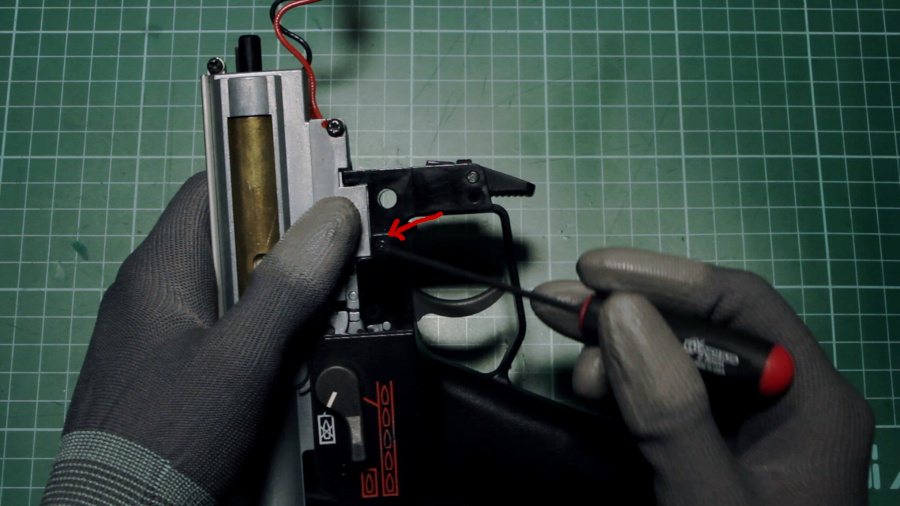
Set the fire selector to the semi-fire position and lift the gearbox loose from the lower receiver. Observe and adjust the position of the tappet plate to make sure that the selector mechanism clears the tappet plate and is not not damaged. If the tappet plate is not moved out of the way it will snag, the gearbox will get stuck and you will not be able to lift it off easily.

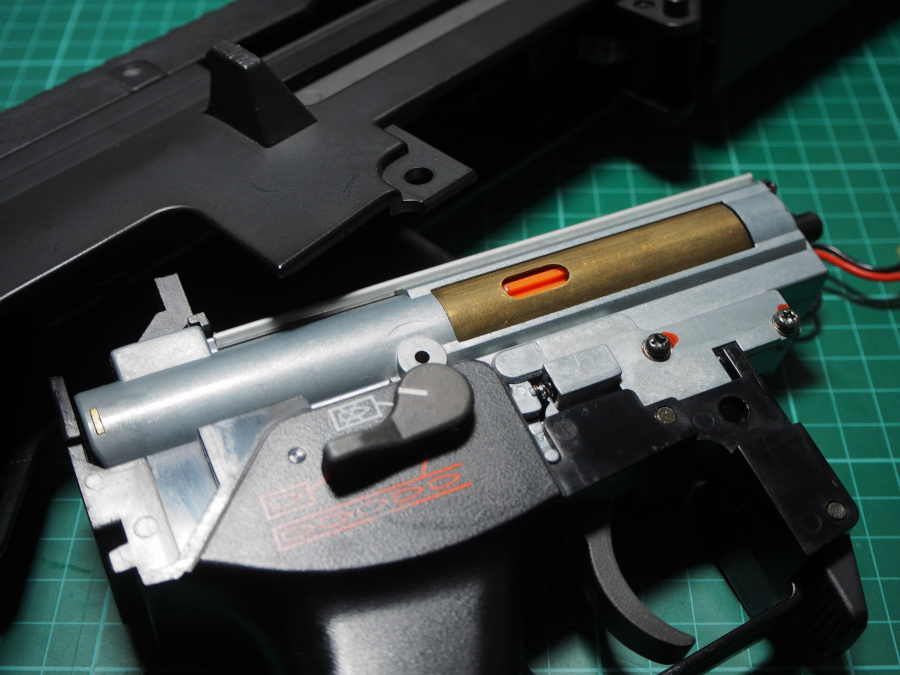
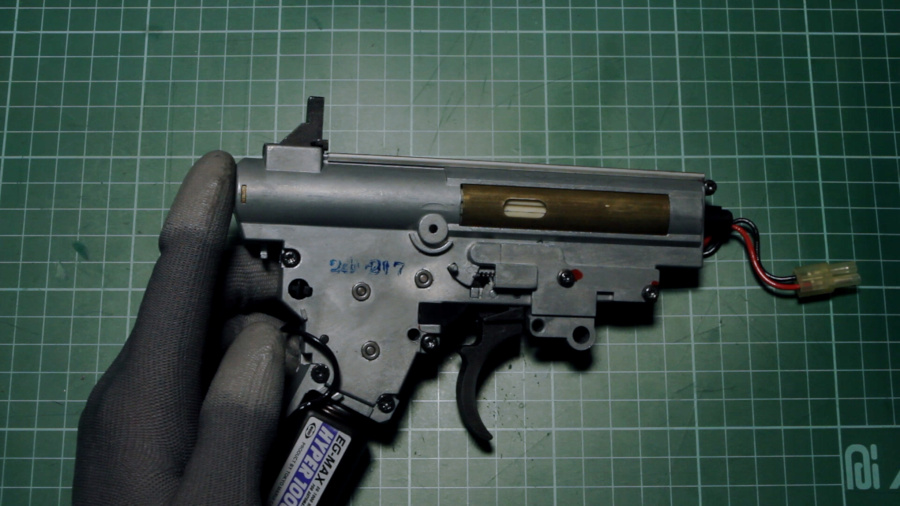
Now the gearbox, which is a version three or v3 gearbox in design, is exposed. By and far, this is one of the easiest AEG models to disassemble. My only concern is that I wish that the receiver pins on the receiver were real locking pins like on the real version so that the process of disassembly could be sped up. If you’re looking for this feature, a look int the Ares AS36 might be worth your while.
Gearbox Breakdown
Now it’s time to tear into the gearbox. To do this you will need a Phillips style screw driver to remove two screws that join the motor cage to the gearbox and the single small screw at the front top part of the gearbox. The three remaining screws require a Torx patterned driver characterized by a rounded off star or flower pattern. For the Torx pattern screws, it is possible to remove them with a slotted or flat head driver as long as it is small enough to fit between the ends within the pattern.
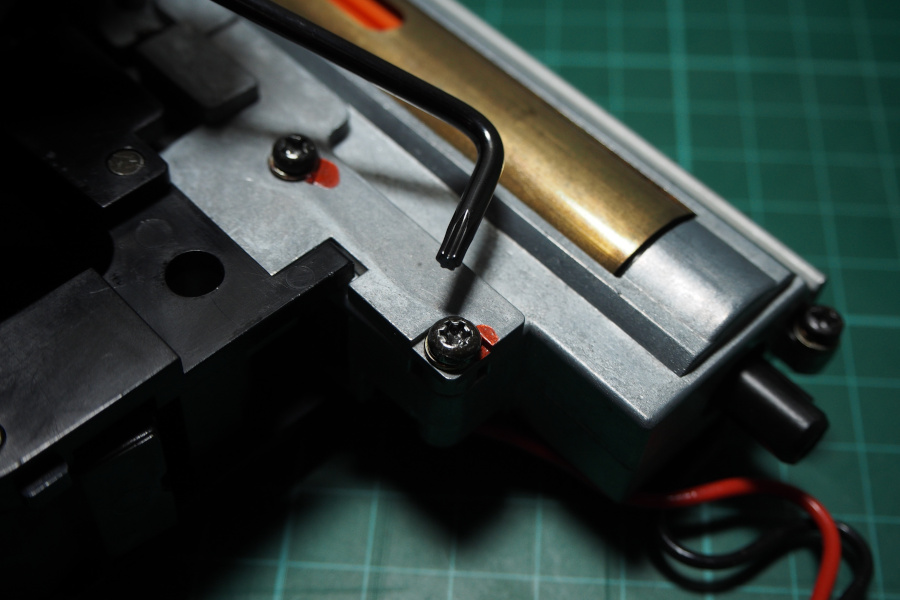
Set aside the screws and washers, then slide off the rail bracket that runs along the top of the gearbox and holds the two halves together. The gearbox can now be pried open. However it is in a state of tension. Pry the gearbox just enough to release the rear black block that has a screw hole used as a securing point to the upper receiver.
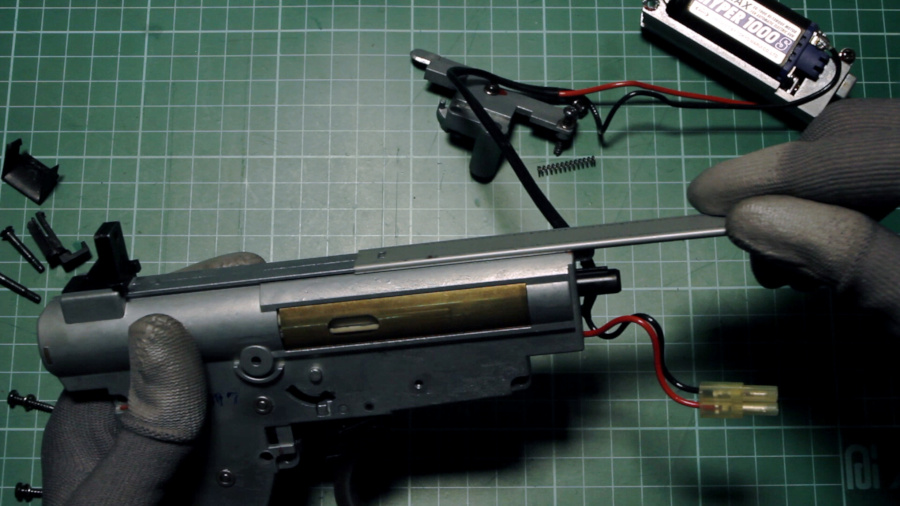
Now continue to pry the gearbox open slowly while taking care in keeping the spring guide rod and main spring secured. Once half of the gearbox shell has been separated, secure and slowly dislodge the spring guide rod from the gearbox and relieve tension from the main spring.
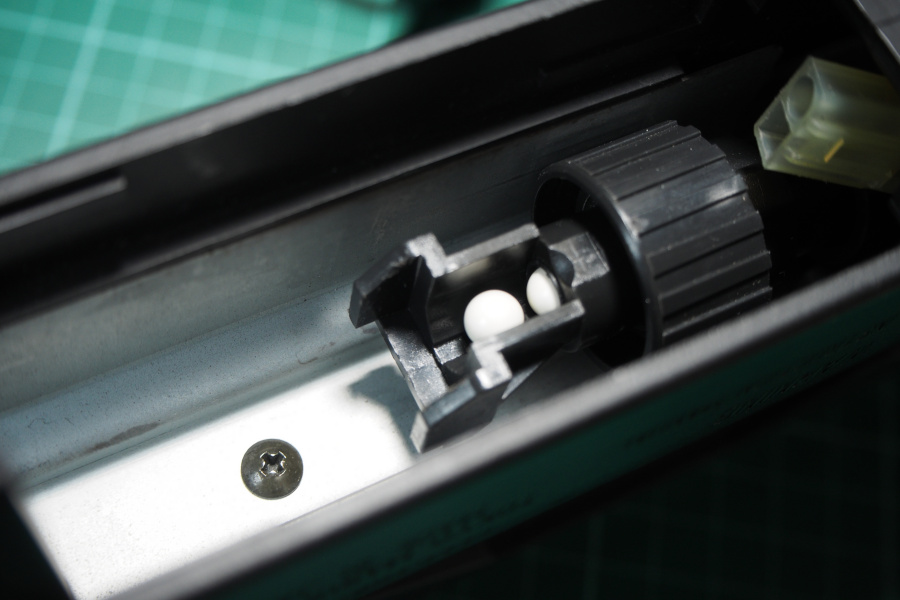
Separated Spring Guide
Careful as I might be, the spring guide, or at least part of it still sprung loose and launched out of the gearbox. And here I thought I had it under control. Be careful people, you could get hurt. Well, as it turns out, the spring guide had separated into two halves and the rod that keeps the spring guide down against the base was no longer in place. This was why the base flung off as the gearbox was pried open.
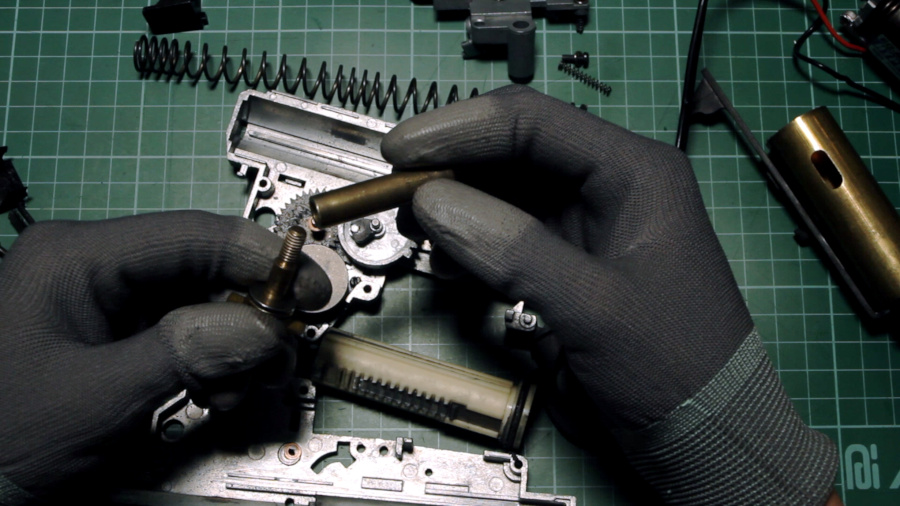
The bearings had bound, but with a bit of working in and some grease, started to move freely again.
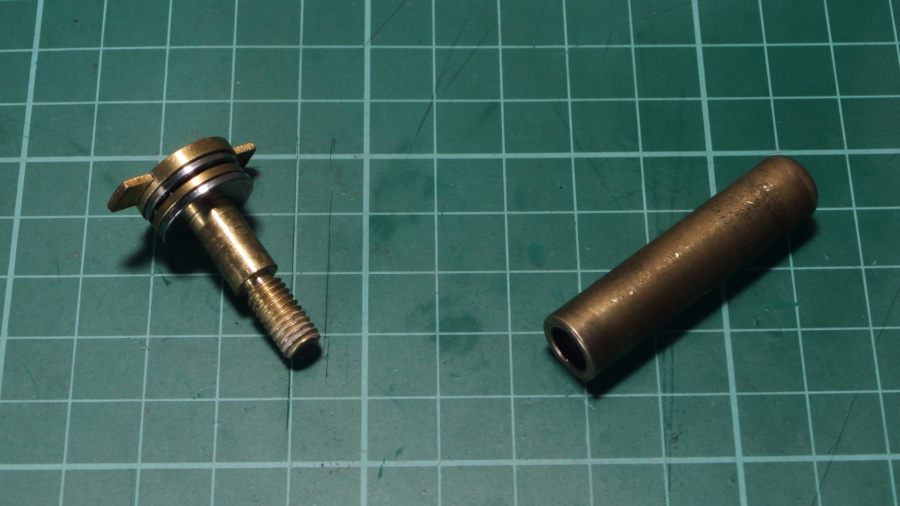
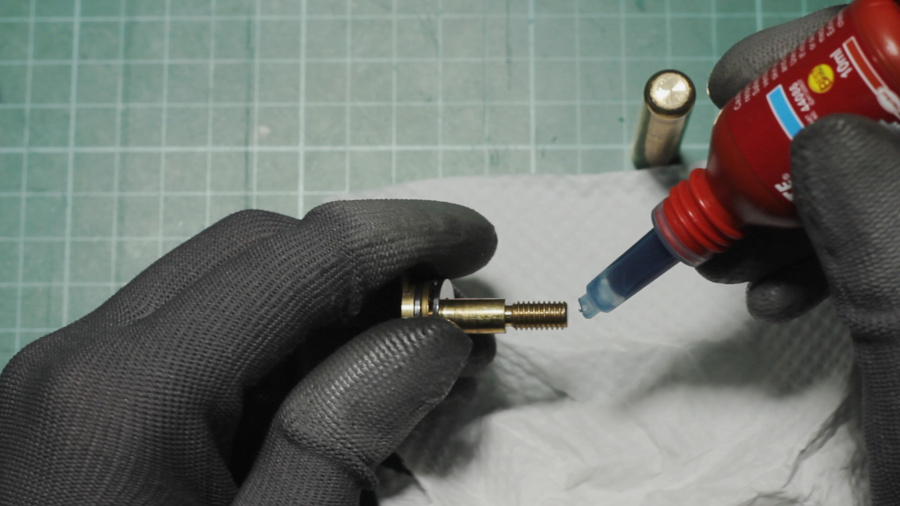
The the rod that serves as the guide for the main spring looked to be in good shape. Luckily this joins with the base via screw threads, and neither the male threads on the base nor the female threads on the guide rod were damaged. A simple wipe down and some thread locker ensured that the spring guide rod was back in service and that the rod would not undo itself anymore.
The effect of a separated spring guide rod in relation to the problems we were experiencing with the Tokyo Marui G36C is not immediately clear, and even with our recommendation to listen for audio cues, not easy to identify.
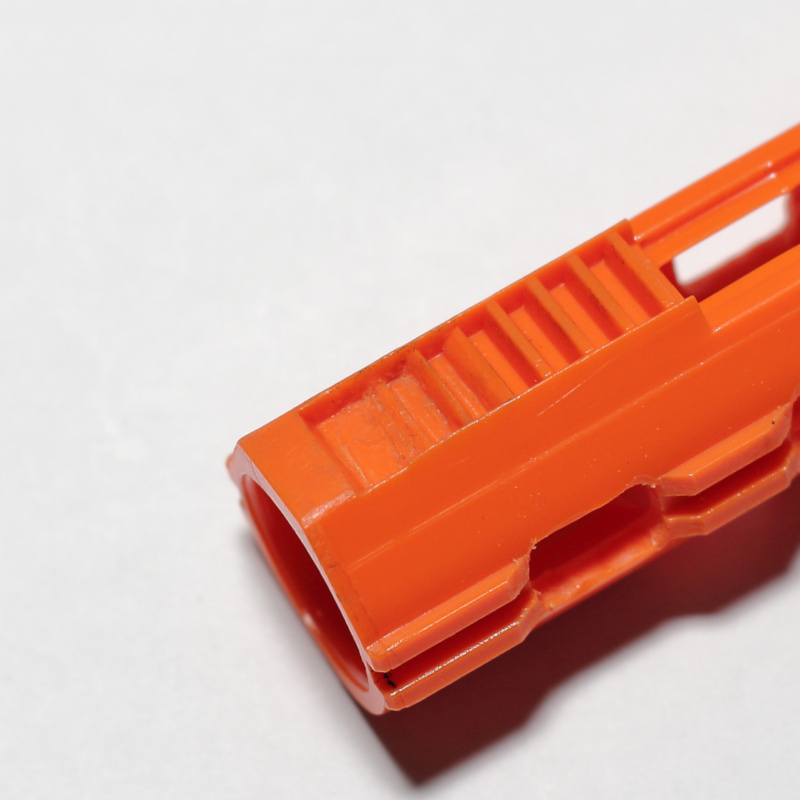
Chewed Out Piston Teeth Rack
The next big reveal was the chewed out piston teeth on the stock Tokyo Marui piston. Equally surprising was the relatively good shape the rest of the piston body was in besides the teeth. It so happens that 10 of the teeth were chewed out by the stock Tokyo Marui gears.
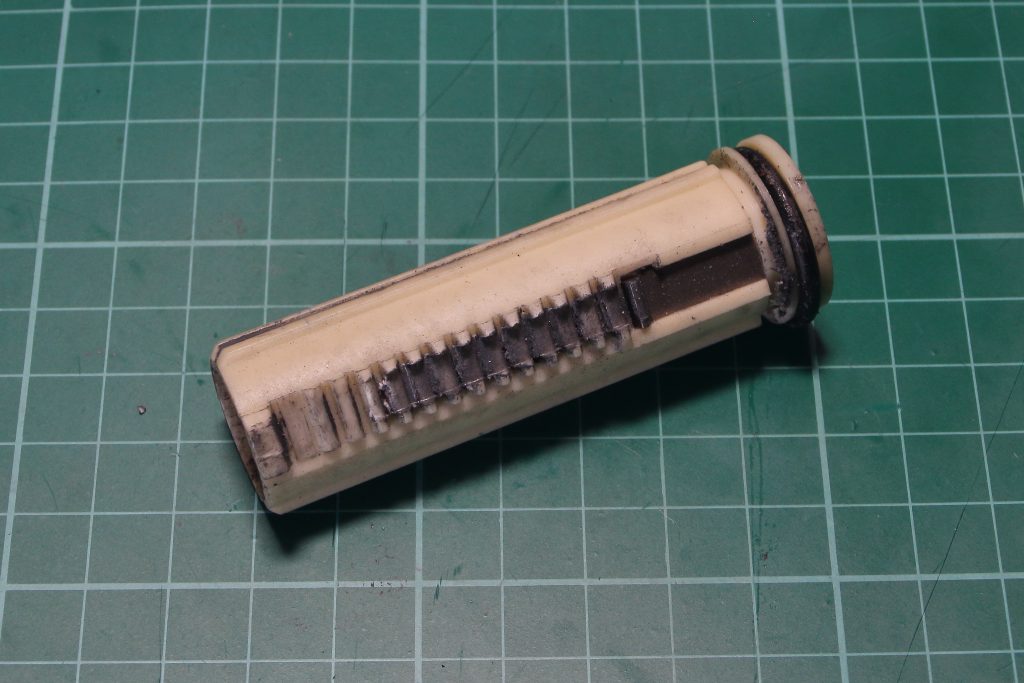
This is one of the more straightforward findings to repair. Stripped teeth messes with the piston’s intended motion and could hamper the cycle to generate proper compression.
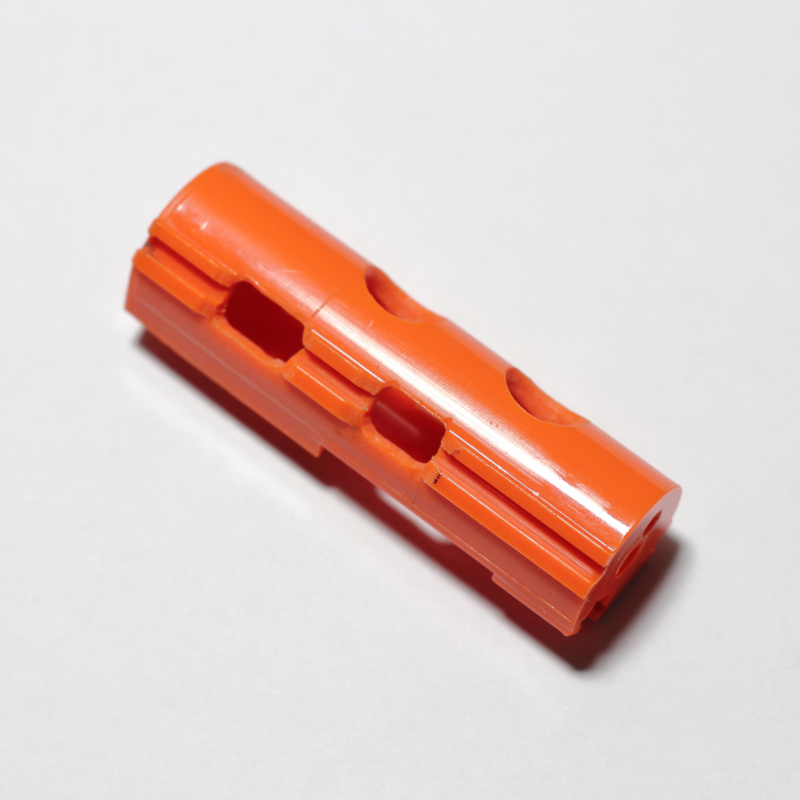
I went to the nearest airsoft store and grabbed a replacement piston body. I’ve started to shy away from pistons that have full metal teeth racks and am now leaning towards ones with a mix of polymer and metal.
I like to engineer failures in my builds that leave the least amount of destruction when something goes wrong. When something binds I would rather that one of the parts take the brunt and give out rather than having to replace more.
I went ahead and purchased one that fit the description. It was an Element brand that had the first half of the rack polymer and the other half metal. Unfortunately the Element piston had very different teeth profile and despite having the 2nd tooth absent, didn’t mesh very well during the initial contact.
So, using a mix of tools such as my Dremel rotatry tool, a set of micro files, and a cutter, I began to reshape the profile on the first few teeth on the new Element piston body. First I shaved material off of the pick up tooth to clear the sector gear because the piston body would get caught on the sector gear and could not travel the full distance of the cycle. I then shaved the 3rd tooth down almost completely, leaving only a very minute height that was enough for the sector gear teeth to still catch on to.
After some more fitting I found that I needed to shave down the 4th tooth nearly half way down. Lastly I took the cutter to the tip of the 5th tooth because there wasn’t enough room for the gear teeth to progress along the rack without needlessly pushing up against the piston body.
After sorting out the teeth profile on the piston body, I was able to eliminate the empty spaces between the piston body and sector gear’s teeth as they ran along each other.
Once the meshing was sorted I went through an extra step that was not really necessary. I shaved material off the piston body to lighten the mass a little. The idea behind this is that you want the piston body to be traveling as fast as possible for efficient compression.

However, I also didn’t go crazy with the material removal because I was not familiar with the tolerances the Element brand of piston bodies were capable of. In the end I don’t think this step was very effective, especially with the relatively low rate of fire we were running. This step only starts to matter when building an AEG with a really high rate of fire and this one I am repairing wasn’t one of those.
Analysis
The AEG began to work flawlessly after fitting in the new piston and repairing the separated spring guide. The muzzle velocity climbed to 390 feet per second and the feeding issue went away.
I am sure that my efforts to fix compression lead to better muzzle velocity readings, but I am still not quite certain as to the cause of the misfeeding problem.
However, if I may be allowed to make an educated guess, I would say that the loose spring guide’s rod shifting along the spring during each cycle caused a change in the characteristic of the piston body’s travel. Add the fact that there were no reliable teeth left to draw the old Tokyo Marui piston body back consistently; the compression must have been in a horrible state and could not provide adequate push behind the BBs to get them past the hop-up chamber. Because of this, the hop-up chamber acted as a strong enough obstacle that prevented BBs from being loaded in.
Of course the feeding mechanism was still working. And when the inevitable double feed would occur, the BB that would be shoved past the hop-up chamber could now be shot out with the terrible levels of compression.
By this logic the problem that this AEG had was misdiagnosed as a failure to feed, whereas it is more akin to failure to fire. BBs were still being fed into the chamber, but the aforementioned factors prevented any sort of functional effect.
However the symptoms can be very similar to failing to fire and I believe the things I just discussed in this article still warrants consideration when diagnosing feeding problems.
Closing
Heya there readers! Firstly, I want to thank you for being here. In case you didn’t know, the Hobby & Tech Warrior website is a dear personal project of mine and is something I hope to have the pleasure of sharing with readers who find its content valuable far into the future. As it stands right now, this website is taking a lot of effort to keep updated.
If you found the information here valuable and would like to help in the maintenance of this endeavor, I’ve set up a tipping page you can check out to give direct support. Otherwise sharing these articles to your friends and social channels also goes a long way. Thank you in advance and I really appreciate your kindness.

That’s it for this airsoft gun repair. We’ll revisit this Tokyo Marui G36C again once we settle on a more advanced build and are ready to make additional upgrades.
Check out the blog section for updates and more articles like this one.
Cheers!
– J4
Hello…Hoping that you can HELP !!! I was gifted a full metal Colt M4….It misfeeds like crazy. I have followed every You Tube video I can find…Velcro…Tape Mags..This happens with mid/max cap, metal and plastic mags…The gun has been carefully assembled several times and everything is tight…no wobble…Is there something I am missing ????? I live no where near a hobby store so I’m on my own…I really want to use this but it is very frustrating…..Thanks for your time…
Hey, sorry for the late reply. Been taking care of some stuff. Does the misfeed happen in semi-auto as well? Have you checked the air seal nozzle’s length? How about drag on the tappet plate, and strength of the tappet plate spring?